Need to know how to darken copper sink or how to make your copper sink look more attractive. Here are our top tips and methods.
Copper sinks naturally have a warm reddish-brown tone that comes from the mixture with alloys such as bronze and brass.
Over time, copper and its alloy change color to darker tones. It is the only feature that distinguishes copper from other materials. The dark tones are known as patina, and most people love them.
If the patina is not as dark as you want it, you can darken it more. All you need is a small amount of copper sulfate, which is available at most hardware stores, and a bucket.
Simply mix the copper sulfate with water until you reach the desired shade, and pour the solution into your sink.
Allow the solution to sit for a few hours, and then use a plunger to suction onto the surface of the copper sink and scrub it clean.
Method 1: How to Darken Copper Sink Naturally
Step 1: Collect the Cleaning Materials Required
You will need;
- Bleach-free dishwashing liquid
- A sponge or piece of cloth
- Small container or bowl
- Hot or warm water
- A clean, dry dishcloth
- Baking soda
- Soft toothbrush
- Ketchup, vinegar, and salt, or lemon (if you want to make it look as new)
With all the required cleaning materials in place, prepare the sink for cleaning.
Step 2: Clear the Sink
Preparing the copper sink for cleaning entails removing anything inside and around that will limit its cleaning.
Then open the tap and rinse off any dirty water and small particles left after removing everything. With the sink ready for cleaning, you can now start the cleaning process.
Step 3: Mix Dishwashing Soap with Hot Water and Dip Your Cleaning Sponge
Look for a small container like a bowl and put some hot or warm water. Then add a few drops of dishwashing soap and mix to form a good lather.
Take your clean cotton cloth or sponge and dip it in the mixture. You are ready to start scrubbing your dirty copper sink with this done.
Step 4: Rub the Entire Sink with the Wet Sponge
Start scrubbing your sink with the cloth or sponge dipped in soapy water. Rub the entire sink, including under your sink’s countertop rims.
If there are any stubborn stains like the green coloring, remove them with baking soda, as demonstrated in the next step.
Step 5: Remove Stubborn Stains
Some stuck-on foods may be challenging to come out when cleaning. Also, when you expose copper to moisture for an extended period, the area turns green. This green coloring is known as verdigris.
Your copper sink could also have some mineral build-up. It can be challenging to remove all these stains by only rubbing them with soapy water.
Add some water to baking powder and make a paste. Then apply the paste to your cleaning sponge or piece of cloth and rub the stained area until all stains are gone.
However, if your copper sink has a damaged lacquered finish and you want to maintain its luster, you can use either of the following natural solutions;
i. A Mixture of Salt and White Vinegar
Start by making the required mixture of white vinegar and salt. Fill a cup with vinegar and add 1 ½ teaspoon of salt.
Then apply the mixture to your cleaning cloth or sponge. Alternatively, if you have a spray bottle, pour it inside.
Then spray or rub the entire sink with the sponge wet with the vinegar and salt solution. It will help remove the tarnish.
Leave the solution to sit on the copper sink for approximately 30 minutes. Then rinse the sink until all dirt and stains are gone and dry it with a clean cloth.
Use a soft toothbrush to scrub any grime hidden in the sink’s dents. If the stains or tarnish don’t come out, repeat the process until all is gone.
In case you don’t have vinegar and salt, don’t panic. Try ketchup.
ii. Ketchup
It’s best to use it if your copper sink has slightly tarnished. The acidity in the yummy paste works like magic on copper.
Apply some on the sponge or cloth and smear it all over the sink. After allowing it to sit for some time, rub it using the sponge with the paste until all dirt and tarnish are gone.
But that’s not all!
In the absence of ketchup, dig into your cupboard for a lemon and baking soda.
iii. Baking Soda and Lemon Juice Paste
If a lemon, the first thing to do is squeeze out its juice. But if you have commercial lemon juice, it’s okay to use it. After the lemon juice is ready, add a teaspoon or two. Ensure the mixture isn’t too thick or light.
Then apply it to the soft piece of cloth and rub it gently onto the entire sink. Continue rubbing until all dirt and stains are gone.
In case you don’t have baking soda, use your table salt.
iv. Salt and Lemon Solution
You need to use this solution if your sink has heavy tarnish. Begin by cutting your lemon juice into two. Then apply some salt on the fresh side and rub the stubborn areas.
If you have some lemon juice, mix it with salt in a spray bottle and spray to all the tarnished parts. Then spray the solution onto the scrubbing sponge or cloth and rub the area.
You may need to use some effort in this process, but the results are worth trying.
If you are out of salt or mix lemon juice and salt and the results are not as expected, you can try mixing the lemon juice with cream of tartar.
v. Cream of Tartar and Lemon Solution
Your copper sink’s tough stains may not come out entirely if you use less salt in your lemon and salt mixture, but they cannot withstand the cream of tartar and lemon solution.
Cream and tartar alone can scratch the copper sink because of their abrasive action. You, therefore, need to mix it with lemon juice. The mixture should be thin but able to cling to the sink. Then apply it to the entire sink using a sponge or piece of cloth. Then leave it for approximately 5 minutes.
When through with the rubbing and scrubbing, it’s time to clean away the cleaning solution with the dirt and stains.
Step 6: Clean Off the Dirty Cleaning Solution
Like the first step, mix some warm water and dish soap in a bowl. Then use it to wash away all the cleaning solution. Use a sponge to rub on the stuck solution or dirt slightly. Continue pouring the warm soapy solution until all dirt and stains are gone.
Then use warm water only to rinse the sink until spotlessly clean. Afterward, prepare to dry the sink.
Final Step: Cleaning and Drying
Drying the sink is the last step. Use a soft, dry cloth to dry the sink until completely dry. Ensure the piece of fabric is clean. You will have finished cleaning your copper sink.
But to maintain its luster, you will need to wax it to shine. The best polish to use is the one recommended by the manufacturer. Use it every time you finish cleaning your sink.
All you need to do is apply some on a clean piece of cloth and buff the sink until you attain the original shine. Your copper sink will be as good as new.
With time, lacquer in copper wears away. Then it begins to discolor or darken. Some people love the new look of aging copper. Interestingly, there are ways of maintaining that dark appearance. They include the following;
Method 2: How to Darken a Copper Sink With Baking Soda
Aging copper with baking soda is easy. It entails the following steps;
Step 1: Collect the Required Cleaning Items
Before starting the darkening process, you will need to collect everything you need. Ensure you have the following cleaning materials;
- A clean sponge or piece of cloth
- A reliable dish wash cleaner
- Baking soda
- Spray bottle
- Warm water
After accumulating what you need, prepare the sink for cleaning, as illustrated in the next step.
Step 2: Clean the Copper Sink
For optimal results, your copper sink must be clean. Start by putting a few drops of liquid dish soap in a bowl with warm water.
Then mix well and dip in a clean rag. Use a wet cloth to clean out any dust and dirt. After all the dirt is gone, proceed to rinse the sink.
Step 3: Rinse and Dry the Sink
Use warm water to clean off the sink until sparling clean. Then use a dry, clean rag to wipe off all the water until completely dry.
Then proceed to prepare the darkening solution
Step 4: Mix Hot Water and Baking Soda
Put hot water into your spraying bottle until halfway full. Then add baking powder until it can no longer dissolve. Then shake the solution and apply it to the copper sink.
Step 5: Start Darkening
Spray all copper parts of your sink. For those hard-to-reach places, pour some solution into a sponge, cotton, or piece of cloth and wet the areas.
Then allow it to settle for about an hour and apply the darkening solution again. Stop there if you attain the dark coloring you are looking for after the second application.
If not, continue to reapply the baking soda solution until you achieve the patina you want.
In the absence of baking soda, you can use vinegar to darken copper sink quickly.
Method 3: How to Darken a Copper Sink with Vinegar
It’s one of the best ways to darken copper quickly. The process is also a piece of cake, as illustrated in the following step-by-step guide;
Step 1: Acquire the Materials You Need
It’s the first thing to do. You cannot start the darkening process with all the requirements. They include;
- Vinegar
- Salt
- Sponge or a piece of cloth
- A clean, dry dishcloth
- A small container
- A steel wool
- Spray bottle
- Ideal copper cleaner or soap dish
- Safety gloves
- Mask
With all the necessary darkening items in place, clear and clean the sink.
Step 2: Clear and Clean the Sink
Things around and within the sink will distract the process. Remove them all. Then clean the sink as the dirt and stains will also interfere with the darkening results.
Start by applying a reliable copper cleaner in a sponge or piece of cloth. Then start rubbing the sink until clean.
If you don’t have the copper cleaner, mix reliable dish soap with hot water and foam. Then dip the sponge in the mixture and scrub the sink until all dirt is gone.
Next, use clean, warm water to rinse the sink until spotlessly clean. Dry all the water using a clean, dry dishcloth.
With a clean sink, it’s now time to make the solution to darken copper.
Step 3: Mix Vinegar and Salt
First, wear your safety gloves. The mixture may irritate your hands. Then mix salt and vinegar in a bowl or spray bottle in equal proportions.
The amount depends on the size of your sink. Suppose your sink is small, make a small mixture and vice versa. Then mix the ingredients until all the salt dissolves.
If mixed in a spray bottle, spray the entire copper sink and allow it to settle for 30 minutes. Alternatively, you can mix the solution in a bowl, dip a clean sponge or cloth in the mixture and apply it to the copper sink.
Then repeat applying the darkening solution and allow the same amount of time to dry before the application. Continue doing so until you achieve the patina results you want.
The patina color to expect is unpredictable. It could be turquoise, blue, green, or any other color. That’s where the fun comes in – when you make your copper sink darken, you create a unique appearance.
But the final appearance will be dusty and crumbly because of the salt if you apply a thick layer of the mixture. You will need to make it even and smooth using steel wool.
Step 4: Smoothen the Sink’s Surface and Rinse
First, Put on your mask because you can inhale the patina while scrubbing it off, risking your health. Then start by taking steel wool and scrubbing the surface until smooth. Afterward, rinse the sink with warm water until all dirt and particles are gone.
Then move on to drying the sink.
Final Step: Darkening
Take a clean, soft, dry dishcloth and wipe out any water until completely dry. You will have successfully darkened your copper sink using vinegar.
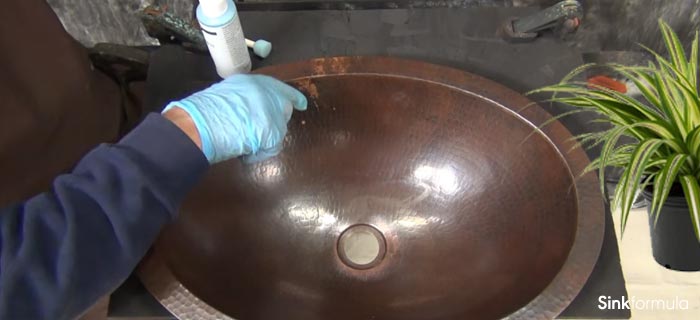
You can also darken copper sink quickly with a liver of sulfur. You use the following procedure;
Method 4: How to Darken Copper Sink with Liver of Sulfur
It’s an excellent way of darkening copper sink quickly. More so, it produces various colors and makes them appear darker. But before you start the procedure, you need to have the materials necessary for the job.
Step 1: Collect the Needed Materials
Ike any other procedure, you cannot achieve the results you want without the required items. In this case, you will need;
- Liver of sulfur
- One cup of water
- Protective gloves
- A small bowl
- Clean rag
- Clean, soft, dry, dishcloth
- Baking soda
- Soft brush
- Warm soapy water
- Household cleaner
- Protective mask
After getting everything you need to complete this process, start cleaning the copper sink or item for optimal results.
Step 2: Cleaning the Sink
Whether you are darkening a copper sink or any other item made with copper, you will need to carry out the procedure when the thing is clean.
If dirty, wash off all the dirt and stains using a rag dipped in warm soapy water. Then rinse it off with warm water and dry it thoroughly using a soft, dry dishcloth.
Also, instead of cleaning the copper with a rag and soapy water, you can treat it using a suitable household cleaner.
When your copper is ready for tarnishing, prepare the liver of sulfur as shown below;
Step 3: Preparing the Liver of Sulfur Solution
The liver of sulfur may irritate your skin. You may also not withstand its sharp, disturbing smell. It explains why you need to wear some protective gloves and a mask before handling the liver of sulfur.
The liver of sulfur comes in either dry, gel, or liquid form. Whichever way you buy it, you need to dilute it directly per the manufacturer’s instructions.
For the dry one, break off a small piece the size of a pea. Then add approximately 240 ml of water to a bowl and drop it in.
The water used can be cold, but it will quickly tarnish copper when mixed with hot or warm water. But avoid boiling water as it produces a harmful gas.
Start applying the solution to your copper as explained below when the sulfur solution is ready.
Step 4: Apply the Solution to Copper
If your copper item is small, dip it into the liver of the sulfur solution. Pick a clean, soft brush and dip it into the solution if it’s your copper sink.
Then brush the solution on the surface. Pay special attention to the dented areas and corners.
Continue applying the solution until you achieve the darkening you want. If you don’t attain the dark color you desire, add a teaspoon of pure ammonia. But it will result in a reddish hue.
Because the liver of sulfur solution turns copper to a more dark color, you need to stop the darkening from happening when you achieve the desired darkening.
Method 5: How to Darken Copper with Brown Patina
Applying brown patina is another way of darkening copper sink quickly. The process is similar to making copper look old using baking soda. It is no hustle. You’ll need to follow the following steps for optimal results;
Step 1: Accumulate the Cleaning Materials Required
Like in other steps, all the ideal cleaning materials are required in this process. Collect each of them and place them at an ideal place in your working area. They include;
- Warm water
- Sponge or lint-free piece of cloth
- Grease cutting solution like dish soap
- The mist producing spray bottle
- Cotton Swabs
- Baking powder
After getting the cleaning materials to use, ensure the sink is ready to darken.
Step 2: Clean the Sink’s Surface
Start by clearing anything within the sink. Then remove all dirt and built-ups by scrubbing the sink with a sponge dipped in warm soapy water. The soap used should be a reliable grease-cutting solution.
Then rinse the copper sink with warm water and start preparing the darkening solution as explained below.
Step 3: Prepare a Baking Soda Solution
Put some hot water in a spray bottle and add baking powder.
Ensure the baking powder dissolves ultimately, and the spray bottle produces a fine mist. It will avoid making drops on the sink’s surface, which causes streaks.
When the solution is ready, start the spraying process.
Step 4: Spray the Sink’s Surface Evenly
Start spraying the sink from one point towards the rest. Ensure you spread evenly and everywhere. Wet the cotton wool swabs with the mixture and apply the solution in the areas difficult to reach.
When through, allow it to dry.
Step 5: Air Dry the Sink
When you wipe the surface before the solution dries, you will alter the finish. Leave it to air dry for a minimum of one hour.
After drying, respray the solution if you don’t achieve the darkness you want. Then let it dry. If you accomplish the patina you wish to, stop spraying more solution.
Final Step: Darkening
Buff the surface using a soft, clean cloth to remove any particles or anything that might have gotten on the sink after drying.
You can also darken copper quickly with green patina. Here is how you do it.
Method 6: Darkening Copper Sink with Green Patina
The bluish-green shade of copper appears unique and attractive. To attain it, you will need to use the following steps;
Step 1: Accumulate the Necessary Cleaning Materials
To tarnish copper quickly using green patina, you need to have the following items;
- Dish soap
- Lint-free rag
- Non-iodized salt
- Detergent-free ammonia
- White vinegar
- Spray bottle
With the materials in place, wash off the copper as described below.
Step 2: Clean the Copper
Dip a lint-free rag in a solution of warm water and dish soap. Then scrub it clean and rinse with warm water. Take a clean cloth and wipe away all the water until completely dry.
When you finish, start preparing the darkening solution as shown below;
Step 3: Prepare the Green Patina Solution
To make the darkening solution, you will need to mix white vinegar, none iodized salt, and detergent-free ammonia.
Start by taking an ideal spraying bottle and opening the cap. Then put two parts of white vinegar. Next, add a half portion of salt and 1 ½ part of ammonia. Shake or stir the mixture until it mixes properly. Then return the spray bottle’s cap.
You are now ready to start spraying the copper.
Step 4: Spray the Copper
Spray everywhere on the copper. Use a sprayer that does not produce large drops as they cause streaks. After spraying everywhere, let the solution dry for approximately one hour.
Then spray again if you don’t achieve the color you wanted. Keep on spraying and allowing it to dry as many times as you can until you get the results you desire.
After the process, the copper will have a greenish powder. Avoid scrubbing it off as it will ruin the copper’s finish. Instead, allow it to set permanently. It will take a few hours.
Step 5: Let the Copper Dry
To set in permanently, you will have to allow the copper to dry for a minimum of six hours. After that time has expired, you will have successfully darkened your copper with green patina.
Eggs are also essential ingredients in darkening copper. When boiled, they darken copper sink quickly. Here is how it works;
Method 7: How To Oxidize Copper with Egg
A boiled egg forms a sulfur ring around its yolk. That’s why boiled eggs smell like sulfur. The results may take time but will be good as those produced by the liver of sulfur solution discussed earlier.
Use the following steps to achieve great results;
Step 1: Get the Needed Items
To make the process work, search for, and assemble the necessary materials. You will need;
- Three raw eggs
- A boiling pan
- Reliable cooking fire
- Sponge
- Warm water
- Reliable dish soap
- A dry dishcloth
- A plate
- A bowl and spoon
After collecting all the things you require for the procedure, start preparing the eggs
Step 2: Boil the Eggs
Put the eggs in a pan and add water. Then put it on the cooker and cover it. Allow it to cook for over 10 minutes. Then switch it off and put them on a plate to cool off.
As the eggs are cooking, ensure your copper item is clean. You need to wash it as explained in the next step.
Step 3: Clean the Copper Item
If your copper sink or item is not clean, wash it with a sponge dipped in warm soapy water. Then rinse it off with clean, warm water until spotlessly clean. Use a clean, soft dishcloth to dry it thoroughly.
By then, the eggs will have cooled down. Remove the shells and put them in a bowl, ready for smashing in the next step.
Step 4: Prepare the Boiled Eggs
After placing them in a bowl without their outer shells, use a spoon or other reliable item to smash them into small pieces.
Step 5: Start the Oxidation Process
If dealing with a small copper item, put it inside the bowl with the mashed boiled eggs. But ensure it doesn’t touch the eggs because it will form colored spots.
Placing the item in another smaller container and then placing it inside the bowl with the crushed eggs will work out great.
The best way to do this is by accumulating all the crashed eggs on one side of the bowl and placing the small container with the copper item on the other side.
Ensure you seal the bowl air tightly to prevent the gases from the smashed eggs from escaping. The gases will turn copper brown. The more eggs, the quicker the darkening process. Leave the copper inside the eggs bowl overnight to attain a darker patina.
For a copper sink, seal the drain hole by inserting its cap. Then place the bowl with the crushed boiled eggs inside the sink.
Next, look for a plastic bag and seal the sink top. Ensure there’s nowhere air can escape from. Remove the plastic bag and the egg bowl when you attain the patina color you want.
Though you can darken copper sink naturally, the above methods will quicken the process. But what usually happens when copper darkens? The following is a comprehensive answer to this critical question.
Why Does Copper Change Its Colors Over Time
As a reactive metal, copper naturally reacts with oxygen to form copper oxide, also known as tarnish or surface coloration. The reaction process is known as oxidation, and it happens slowly.
When left to oxidize for an extended period, patina or a blue or aqua-green coloration forms a protective layer of copper.
Patina indicates age, which increases the value of copper. Apart from oxygen, other things can change copper color over time. They include but are not limited to;
- Dust
- Moisture
- Some chemicals
- Human touch
- Acidic and heat compounds in certain foods such as wine, vinegar, and milk
In the presence of all the above components, copper tarnishing is inevitable. Keep your copper sink away from the above elements to reduce the tarnishing process. But there’s no way you can prevent it from reacting with oxygen. That’s why copper changes color with time.
Some people apply lacquer or wax to protect the copper from contact with oxygen. But it’s usually hard to maintain the protective layer, which comes out with time. Then the oxidation continues.
The process of darkening copper sinks quickly may be risky. It’s therefore vital to take safety precautions while undertaking the process. They include the following;
Safety Precautions to Take During Darkening Copper
- Always wear protective gloves as some ingredients used in the darkening process may irritate your skin.
- Some solutions used in tarnishing copper quickly may astray and enter eyes, hurting them. To avoid that, wear protective goggles before you start the darkening process.
- Other chemicals used as the liver of sulfur may have irritating smells. Some darkening solutions may be dangerous to your health when inhaled. Protect yourself by wearing a mask.
- After using some items like clean-up rags, dispose of them as per the regulations. Otherwise, they are hazardous wastes that can pollute the environment and harm all living things.
- Always have a fire extinguisher in place while dealing with some flammable components like the liver of silver.
- It’s a brilliant idea to have a first aid kit nearby while undertaking the darkening process. That way, you can attend to a problem when it occurs and prevent further damage before seeing a doctor.
The methods of tarnishing copper are many, as illustrated above. But some are faster. You may wonder which way is the fastest. Here is the answer;
How Can you Darken Copper Quickly?
Dipping or applying a solution of white vinegar, household ammonia, and table salt will copper very fast. The ingredients ratio of the solution includes;
- A cup of white vinegar
- ¾ cup of ammonia
- ¼ cup of table salt
Mix the mixture in a bowl or small container and dip your small-sized copper item in the solution. Then leave it until it tarnishes to your desired darkness.
If it’s a large item like a sink, use a soft cloth or brush to apply the surface with the mixture. Continue reapplying the solution until you attain the tarnish you want. The process takes a short time compared to other darkening methods.
Summing Up
As illustrated above, copper sinks darken naturally. But the process is slow. The new copper color attained through the oxidation process improves its appeal and value.
Instead of waiting for an extended period, you can darken a copper sink quickly through the various methods discussed above. But first, you need to ensure that the sink is clean.
All the ways of darkening copper sink described in this guide work out excellently. But applying a solution of liver of sulfur quickly brings results.
Whether you are a beginner or have been doing it, the above guide about darkening a copper sink will help you out.