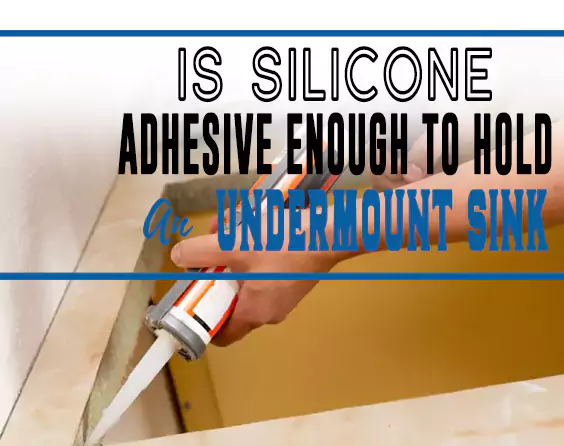
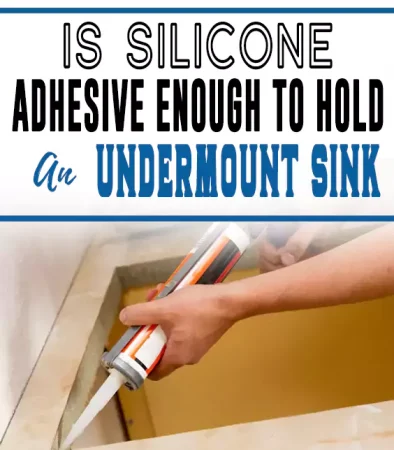
Due to the absence of rims between the undermount sink and the countertop, many people ask is silicone adhesive enough to hold an undermount sink?
The simple answer is that a strong sink adhesive is required. The adhesives and clips suspend the heavyweight from beneath the countertop to keep the sink in place.
Using the wrong sealant will lead to leaks at the sink’s edge days or weeks after installation. So, to hold an undermount sink in place without experiencing leaks, you will need a flexible and resilient adhesive.
However, how well it holds depends on the materials involved. But, Silicone does the work for most materials. But, what adhesive for undermount sink? Is silicone enough to hold an undermount sink?
Is Silicone Strong Enough for Undermount Sink?
Attaching Undermount sink with silicone caulk is very common. Silicone is a very powerful adhesive and can hold your sink in place when used in combination with epoxy.
However, for durability, you should use corner clips or mechanical support as anchors to help keep it steady.
Which Silicone for Undermount Sink?
Silicone bonds better than most adhesives and is thus great for sealing an undermount sink. The standard silicone adhesive is 100% pure silicone sealant.
This grade of single-component silicone is great for the job because it binds to everything. A good example of a 100% pure silicone is the Gorilla Clear Silicone Sealant Caulk.
Is 100% Silicone an Adhesive?
Yes, 100% silicone is an adhesive sealant, and a good one at that. It can serve multiple purposes including sealing, binding, and caulking. Therefore, most manufacturers recommend it for the installation of undermount sinks. Its resilience and flexibility make it good for binding surfaces together.
How Strong is Silicone Adhesive?
The Silicone Adhesive has a very high tensile strength of 7.75 MPa. It can also withstand extremely high temperatures up to 600° F or 315° C.
Silicone adhesive is water, age, vibration, and shock-resistant. The Undermount sink adhesive is in the form of a gel but cures to become a strong, durable silicone rubber.
What Adhesive is Suitable for Undermount Sink?
The installation of an undermount kitchen sink requires perfection for the sink to be enjoyed. To install the sink, you will need certain tools, the most important of which is the Undermount sink adhesive.
Silicone adhesive fits nicely and just a tube will do. Specifically, clear and translucent silicone gives the best bond.
What is the Best Adhesive for Undermount Sink to Granite?
When installing a sink on granite, the outcome is as lasting as the strength of the adhesive used. To get a proper hold and a long-lasting attachment, you should use a clear 100% silicone Undermount sink adhesive.
Granite retailers warn against using construction adhesives. So, you should opt for a silicone advanced adhesive for granite countertops.
Can You Use Silicone Caulk on Granite?
Although granite doesn’t absorb water, caulking undermount kitchen sink is a necessity as it’s susceptible to leaks. However, like latex caulk, not all caulk materials have a firm hold on granite.
But luckily, silicone caulk is perfect for granite as it is strong and durable. For a granite countertop, silicone ASTM C920 or Loctite is your best bet.
What is the Best Adhesive for Undermount Kitchen Sink?
If you want to install an undermount sink on a countertop (read how to install undermount sink to quartz), there are several adhesives for this on the market. However, to get the best result, manufacturers recommend 100% silicone adhesive that is water-resistant.
This Undermount sink adhesive will give the best bond to most types of materials when applied properly thus preventing leakage.
Types of Undermount Sink Glues
To fix or install an Undermount sink, you need glue. While there are various types of glues in the market, only specific adhesives are suitable and efficient. For caulking undermount kitchen sink, you need a water repellent adhesive.
Not all are strong enough to deal, bond, and support the weight of the sink all at once. So, an adhesive for undermount sink should be able to deliver maximum bind and support.
There are two major types of Undermount sink glue which are:
- Silicone adhesive or silicone caulking, and
- Epoxy adhesive
Both are favorable for installing Undermount sinks because they are strong and water repellent. Also, they have high resistance to moisture, humidity, and dampness. Silicone especially bonds well to most countertop materials.
Thus, both types of glue are used to secure undermount sinks. To do this, you will first apply a two-part epoxy adhesive (resin and hardener). Next, you apply your silicone caulk around the perimeters to seal it up.
Is Epoxy Strong Enough to Hold Undermount Sink?
The two-part epoxy (resin and hardener) is a good filler. It dries off fast, requiring only 30 minutes. It’s strong, cohesive, and can resist moisture thus filling microscopic holes and creating a strong attachment.
However, though it is used as an undermount sink adhesive, it cannot hold if used alone.
Does Silicone Hold Sink in Place?
The function of the silicone adhesive or caulk is to seal the sink as a preventive measure against leakage. Though it binds the undermount sink to the countertop, you can’t rely on it to keep your sink in place when wet.
The mechanical fasteners in the form of metal clips are the actual anchors that hold the sink in place.
How to Attach Undermount Sink to Slab Using Silicone?
Attaching an undermount sink to a slab using silicone is an easy task you can perform. I’ll give you an easy DIY step-by-step guide to follow.
However, you’re going to need acetone, a caulk gun, rags, clear or translucent silicone, two-part epoxy, 2 bar clamps, cardboard, and a wooden slab. So, here are the steps to do it.
Step 1: Selecting Your Sink
The first step is pretty easy. It entails you selecting a sink that suits your taste before the slab is cut to avoid a mismatch. When you select a sink, take note of its specs and inform your stone fabricator.
By doing so, you will get the perfect slab for your undermount sink. With a perfect pre-cut stone slab that fits your undermount sink, the installation will be easier for you.
Step 2: Get Your Tools in Place and Get Cleaning
Before you proceed, you’ve got to have all the tools listed above. Keep them close by and begin your task. You have to clean the top and underside of the sink and slab to remove dust and dirt.
So, apply acetone to your rag and clean. Then, go over it with a neat, dry rag. When cleaning, focus on the perimeters where you will apply glue, or else your sink will not stick.
Step 3: Prepare to Install
Fill up your caulk gun and apply a sizable bead of silicone undermount sink adhesive around the sink’s perimeters. If the silicone is too thin it won’t hold and if it’s too much it will spill over. So, go with a moderate amount.
Step 4: Install and Position Your Sink
Place two sheets of cardboard on the cut edges of the slab to avoid scratches. Place a wooden board across the opening in the slab so it sits on the cardboard.
Next, place a clamp inside the sink. Proceed to gently lift up the sink and clamp it securely onto the wooden board.
Step 5: Time for Adjustments
Having clamped the sink, examine and adjust it where necessary. You should ensure that the overhang lies evenly on all sides.
Step 6: Time to Clean Again
Once it is properly straightened, the excess glue will ooze over the sides so you clean it up while it’s wet. Dip your finger in acetone and give it a firm wipe to ensure it’s smooth.
Step 7: Final Touch
Leave it for 24 hours to cure. Check the instructions on the adhesive because some take a longer time to dry. When it’s dry, flip it over and test the strength. Finally, it’s set for use.
What to Consider When Using an Undermount Sink Adhesive?
Normally, installation using the regular silicone undermount sink adhesive takes a professional about 30 minutes. However, there are new MS polymer adhesives available in the market claiming faster installation.
Though they’re good, they aren’t always reliable for holding undermount sinks because of the weight. So, here are factors to consider when choosing an undermount sink adhesive.
1. Curing
MS polymers don’t cure in seconds as they claim. Curing begins from the outside and goes in so the outside may be dry while the inside is still wet. This misconception may mislead and prevent you from attaining 100% bonding strength.
2. Sink Positioning
The outer layer of silicone takes a longer time to cure in comparison to MS polymer. Therefore, you have enough time to properly position your sink using silicone.
3. Resistance to Mildew and Mold
Silicone adhesives specifically for kitchen and bathroom use. Therefore, have fungicides that protect the seal from mold and mildew for three years. On the contrary, MS polymers are industrial adhesives that have been repurposed. So, they lack fungicides.
4. Replacement
Changing an undermount sink installed with silicone is easier as you just cut the silicone and remove the fasteners. Anundermount MA polymer is harder to remove and could lead to cracks on your cabinet or countertop.
Can You Just Glue an Undermount Kitchen Sink?
Securing a sink to a countertop with glue alone isn’t enough to hold a functional Undermount sink. When the weight of water and dishes are added, the sink is likely to crash having been held by just glue. So, you either use a combination of glue and two-part epoxy or glue and sink clips.
What Kind of Glue to Hold A Sink in a Vanity?
A bathroom vanity sink can be held by a silicone caulking seal. This caulking glue is strong, waterproof, and watertight, so it seals the sink and prevents infiltration of water. With all these properties, it prevents your countertop from experiencing rot.
What Will Silicone not Stick to?
Silicone only sticks to the adhesive system or Pressure Sensitive Adhesive. Therefore, it depends on the pressure applied to the stick but even at the same pressure, some materials are more stackable. The reason is that the surface energy of some materials is lower than others. Hence, the difference.
What is the Difference Between Silicone Sealant and Silicone Adhesive?
Although silicone sealant and adhesive are similar and used interchangeably, they are not the same. The difference lies in the quantity of filler present. Sealants contain fillers like cellulose and chalk which reduce the adhesive properties of silicone. On the other hand, silicone adhesive contains a single compound which is 100% clear silicone.
Also, a sealant is wet and needs to cure before achieving its aim, while adhesive is viscoelastic and doesn’t cure. Hence, a cured silicone rubber will require an adhesive to stick to any substrate. Finally, a silicone sealant is watertight and airtight, while a silicone adhesive binds.
How Long Will Silicone Last?
The shelf life of silicone while still in its container is one year. However, when applied, silicone sealant or adhesive lasts way longer. The minimum time frame for which silicone is effective is 20 years.
For this period, it remains binding, watertight, and airtight. However, when its strength begins to weaken, you can always reapply it.
How Long Should Silicone Dry Before Adding Water?
Normally, silicone sealant takes 24 hours to dry completely, after which it can resist water, moisture, and dampness. However, if it has a very high degree of consistency, it may take longer to dry. If it comes into contact with wetness before drying, it may take longer to cure or the seal may be weak.
How Thick Should Silicone Sealant be?
Silicone sealants are liquid and have a gel-like consistency but cure to develop a rubber texture.
To secure an Undermount sink with silicone sealant, a like or bead of caulk should be more than ¼“. Silicone sealant shrinks as it dries up therefore, anything thinner than ¼” will be too thin to create a proper seal.
How to Smooth Silicone Sealant?
In order to get a neat finish, it is necessary to smoothen your silicone sealant after application. To smoothen and secure an Undermount sink with silicone sealant, you will need either alcohol or spirit.
If you’re using alcohol, transfer it into a spray bottle and spray it onto the caulking bead. Then, run your finger over it before the alcohol evaporates to smoothen the silicone sealant.
When using spirit, dip your finger into spirit to prevent the silicone from sticking to you. Then, run your finger over the bead of caulk with stable pressure. These methods will give you a neat, smooth finish.
Wrap Up
An undermount sink is a welcome replacement for drop-in sinks as they eliminate the problem of trapped food particles and diet. Also, their aesthetic is on fleek as it gives a streamlined look to your kitchen or vanity. If you love the look, you can get a professional to handle the installation or easily do it yourself.
An undermount sink adhesive is the most important item you’ll need for installation. Though there are numerous types of glues, the best is 100% clear silicone adhesive/ sealant. It binds the sink to the countertop and seals the perimeters leaving no space for leakage, due or moisture.
Silicone adhesive can be used for both the kitchen and bathroom. It has a one-year shelf life, dries under 24 hours, and lasts for 20 years. It binds any countertop material including granite which is the best. And yes, Silicone adhesive is enough to hold an under-mount sink.