
Looking for information on what the kitchen sink drain’s rough-in height should be? You will find everything you need to know right here with our complete guide.
The kitchen sink drain rough-in height depends on a number of factors which include the location of the P-trap, the size of the sink drain, the height of the kitchen countertop, the type of the kitchen sink, and the pipe connections.
But, how high should the kitchen sink drain rough-in height? The rough-in height of a kitchen sink drain is 20 – 24 inches.
In addition, if you don’t know how to measure the kitchen sink drain height, you won’t be able to prevent common problems when installing a kitchen sink.
What is The Rough-In Height for Kitchen Sink Drain?
Most kitchen sink drains have a rough-in height of 20 to 24 inches from the floor. This is usually enough for the P-trap to allow proper drainage.
It also allows enough space for both the hot water and cold water lines to fit into place nicely.
When taking measurements for your kitchen sink plumbing rough-in dimensions, make sure you leave about 24 inches or less beneath the drain, otherwise, the p-trap might be attached to the floor.
Having a sink that’s closer to the ground means that your p-trap will be closer to the floor.
Thankfully, you can adjust both the height and the depth of the kitchen sink drain when it’s being installed.
Kitchen Sink Drain Height from the Floor
A standard kitchen sink installation has a kitchen sink drain of approximately 24 inches from the floor.
However, the determination of the correct kitchen sink drain height will depend on the height of the countertop, the depth of the sink, and the height of the trap.
Sufficient space must be left for the P-siphon for proper drainage. Otherwise, the siphon will be fully attached to the counter bottom, and this makes them difficult to remove when replacement or repair is needed.
Therefore, it is necessary to choose the height of the kitchen countertop, then choose the type and depth of your kitchen sink.
For instance, if you choose a standard countertop that is 36 inches high and the sink is 7 inches deep, then the drain has to be 29 inches above the floor.
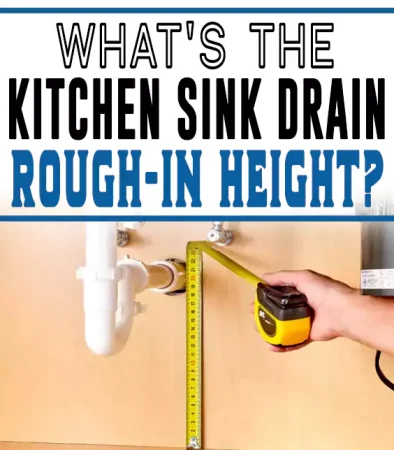
How to Measure Kitchen Sink Drain Rough-In Plumbing Height
Tools you’ll need:
- Paper
- Pencil
- Ruler
- Measuring tape
1. Measure the depth of the sink
The first thing you need to do is take a ruler and measure how deep the sink is. Put the ruler across both the base and the top of the sink.
2. Measure the full length of the sink
After getting the depth of the sink, the next thing to measure is the full length of the sink. The length of the sink starts a little above the side of the sink that is curved.
Taking your tape, place it at that same point near the sink’s bottom to get the full length of the basin.
3. Measure the width of the sink
The next thing to measure is the full width of the sink and you do that by placing the measuring tape at a position that is just a bit above the bottom of the kitchen sink.
Take the tape to the same place on the other side of the sink and measure from back to front.
4. Measure the width of the kitchen sink’s top
Unless your kitchen sink is an undermount style sink, its lip will extend from the basin all the way to the countertop. To measure its width, remove the kitchen sink, turn it upside down, and measure the sink’s lip.
Next step is to measure the size of the cabinet’s opening. Simply go under the sink and place your tape to measure on the top left, then stretch to the top right to get the accurate measurement.
5. Measure the countertop hole
After measuring the width of the sink, the next step is to measure the countertop hole. Start by removing the old sink, this could be done with the help of another person.
Take out your tape and place it across the left edge of the countertop hole. Measure the length of the hole from the left edge to the right edge.
Once done, take the tape and measure the width of the hole from front to back.
6. Measure how wide the cabinet opening is
If you have one of those sinks that are attached to a cabinet, then you have to measure more than the sink. Get underneath the sink’s countertop, take the tape, and measure from the top left to the top right corner.
Kitchen Sink Drain Distance from the Wall
There is no specific minimum distance that must be maintained between your sink drain and the wall. So any distance is fine so long you can connect them.
Kitchen Sink Drain Rough-In Height with garbage disposal
There are no building codes as to the minimum height of a kitchen sink with garbage disposal. However, a standard kitchen sink drain height can typically range from 20 to 24 inches.
For sinks installed at non-standard heights, it is permitted that they can vary slightly below or above this range.
Considerations Need to be Taken for Sink Drain Rough-in Height Measurement
1. The location of your P-Trap
The location of the p-trap will have a major effect on your kitchen sink water supply rough in height.
The International Residential Code recommends that the P-trap should be fixed at a maximum height of 20 inches beneath the sink. The rough-in sink drain needs to be fixed at a height that allows the P-trap to be connected easily.
2. Sink drain size
You have to make sure the sink drain you want to rough-in is the right size for the space you have available for a sink drain. Most sink drains have a depth of 8 inches.
However, many people prefer a bigger sink drain for the kitchen.
A bigger sink gives you more space to wash bigger dishes. Please note that the size of your sink drain will affect the height of its rough-in.
This is a major factor that will determine how high your sink drain rough-in will be. Most kitchen counters will be 36 inches tall. Be careful to make sure that your sink drain is not installed too low.
3. The height of the kitchen counter
Pipe connections will affect the roughing-in of your sink drain. Make sure to rough in your sink drain without interfering with other pipes.
Especially the hot and cold water lines which should be installed above the sink drain rough-in.
How does drain height impact the permit process for sink installation?
Roughing-in refers to construction work that you do before the work is checked for safety by a local inspector. If the work passes the inspection, then it moves on to the completion stage.
For sink installation rough-in, the plumber will connect all supply and drain pipes through their respective studs. The pipes will be passed through the floor to their kitchen sink(s).
The inspector will then come over and inspect the work for safety. If the work is approved, then the plumber can go ahead and add the finishing touches for sink installation.
Once done, the inspector is invited over again. This time for the final inspection. If the work is up to standard, the inspector will approve it. If not, the inspectors will return at a later time when the needed changes have been made.
Can kitchen sink drain heights be adjusted?
Some individuals will find that they need to adjust the height of the sink drain. If not done properly, this can lead to issues with the sink drain.
Before you adjust your sink drain height, make sure to take accurate measurements of your sink drain and its parts. This will help you make the adjustments without having to run into safety issues.
How Do you Rough-In a Kitchen Sink Drain
Step 1 – Make a layout measurement for your rough-in drain
The first thing to do is to consider the height of your sink and the depth of your sink. Then make a mark on the stud at the back of the sink, it should be 12 inches or higher beneath the sink.
The reason is that the height will allow enough space for the p trap installation when you want to mount the sink.
Once you have marked the point, make a route for the sink drain line to a point where it can be connected to a larger drainpipe, for example, the toilet drain.
Step 2 – Begin your drainpipe installation
Start by cutting 2 inches in length from the PVC pipe by using a saw. Then, make a hole, at least 1/4 inches deep into the stud or floor plates below the sink.
After you have done this, run the drainpipe through these drilled holes, but you must maintain a downslope of at least 1/4 inch for each foot towards the sewer.
Once the sink drainpipe links with the larger drain line, connect both pipes using a sanitary tee, it must have ports of 1-1/2 and 2 inches.
Use the 2-inch port for the drainpipe connection, and leave the other port empty (1-1/2 inch) as this port is meant for the vent connection. Use plastic cement to glue these joints and allow them to dry before you proceed to the next step.
Step 3 – Determine the route of the drain vent
The drain hole must be raised from where both pipes were connected, and then you must connect it to the main vent.
Decide the perfect route, but you should know that all horizontal sections should have at least 1/4 inch per foot slope towards the sink.
Step 4 – Begin the vent installation
Start by drilling holes into the stud and wall plates by using a drill bit of 1-5/8 inch, these holes will be used for the vent.
The number of holes you will drill and where you will drill them varies as it depends on your estimates of the vent routing layout in the previous step.
After drilling the holes, line up the vents and cut the vent studs to a point more than the highest fixture in the house so that you can attach them to the main vent tank.
Once you have done that, link the vent to the 1-1/2 ports on the tee that is responsible for the connection between the sewer and drain pipe.
Use the plastic cement to seal the joints and allow it to dry before you proceed with other plumbing work in the kitchen.
Can a p trap be higher than the drainpipe?
When installing a p trap, it must be connected directly to the sewer, this way, everything will get to the drain. You should not install the P-trap under the drainpipe.
The reason is that the gravity of the water will dislodge the water, rather than flow down naturally. Therefore, it is not necessary to install a drainpipe above the p-trap.
How to Make a P-trap Higher
The tailpiece is what attaches the P-trap to the sink. Therefore, you must have the correct joints in this area before increasing the height.
Step 1: Turn off the faucet so that the water does not run out of the sink.
Step 2: Make correct measurements to perfectly fit the P-Trap vertically, by using a ruler to measure the height from the drain.
Step 3: Once you’ve got the correct length, use a hacksaw to cut off the excess length from the top
Step 4: There are several nuts and flanges attached to the p trap, remove them to have a passage opening. Then pull it towards the tailpiece. Ensure the diameter is correct. If loose, use a smaller diameter.
Step 5: Now you can move the p-siphon above the drain hole to your desired height.
Step 6: Now, tighten the joints and tighten the nuts to have a tight joint without leakage.
Conclusion
One of the main things to consider when remodeling your kitchen is the sink drain’s rough-in height. Knowing the kitchen sink plumbing rough-in height will be useful when you need to plumb the sink drain.
The distance between a kitchen sink drain and the floor is 20 – 24 inches. This is the best distance for proper drainage.
The rough-in height can still be adjusted during the installation phase. However, make sure that whatever dimensions you use when adjusting the drain height should meet the standards.