
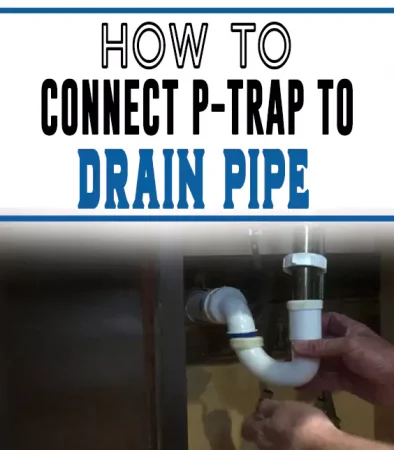
Need to make changes to your p-trap on your sink drain? Here’s handy tips for how to connect the p-trap to the sink drain.
A p-trap is a U-shaped bend normally found underneath a sink that connects a sink drain to the sewer system. If you fail to do the PVC trap installation properly, it will create issues for the particular sink it serves. It could also lead to more universal issues.
For the p-trap to work properly it has to be connected to the drain pipe securely. By connecting a p-trap properly, you can avoid any problems and ensure that your sink drains smoothly and efficiently into the sewer system.
What is a P-Trap and How Does it Work?
A p-trap is crucial to the overall plumbing in your home and should therefore be installed wherever there exists an open drain line. This is if the drain line releases water into a drain waste vent system.
Whether you want to install a p-trap to kitchen sink plumbing, you need to follow the right steps in doing so. It works by providing an airtight seal that stops sewer gases from being released into your house via the drain line.
The p-trap does this by holding some of the drain water in its lower bend which is J-shaped. It also traps all those solids that could clog your sewer or the drain line.
These p-traps work properly thanks to the water seal found in a curve located on the trap. With it, the solids will remain in the trap until they break down.
Every time you use the trap, more water is introduced into the p-trap. This water clears away all the remaining traces of dirt.
How to Connect P Trap to Wall Drain
For a p-trap to function accordingly, you need to install it on your wall. Here, the p-trap is connected to the pipe that exits the sink and the other to the wall drain pipe.
1. Slide the Shorter Side of the P-trap into the Part that Drops to the Sink’s Drain
Once you’ve done this, align it to the opening found on the wall of the trap arm. This can be achieved by moving it up and down until it is in place.
In case you’re unable to move the p-trap higher up the tailpiece, cut the tailpiece using a hacksaw. However, in case the p-trap is above the wall drain, it’s worth buying a tailpiece that is longer.
You should install the trap directly under the drain. This will ensure that you have an easier time confirming whether or not it is holding water as it should be. This also ensures greater water gravity.
2. Separate the Lower Part of the P-Trap
Once you’ve taken it apart, insert the trap arm into the wall drain. Fit it properly until it goes as far as possible.
You can then start pulling the trap arm from the wall up to the point where it will fit properly with the U-shaped part at the top of the trap.
Ensure the trap arm does not completely come out, otherwise, you will be forced to buy another one.
If you notice the trap arm still extending past the U-shaped part when in the wall fitting, cut it. A hacksaw will help you cut it to the required length.
3. Insert the Trap Arm Back into the Wall Drain
Once you have inserted it make sure the trap arm is aligned to the trap. Thread it lightly on the slip nut. It is important to note that you should never tighten it in this step of the process.
4. Tightening the Slip Nuts
Only when all the parts of the trap are properly joined should you tighten the slip nuts found on the wall drain fittings. Also, tighten the ones on the tailpiece.
You can use some water pump pliers to tighten them further. Check one more time if the p-trap aligns with the wall drain. If it does not, you should cut it accordingly.
When connected, the p-trap will properly retain water and prevent any sewer gases from going into your kitchen.
How to Connect P-Trap to Floor Drain
A floor drain refers to a plumbing feature usually installed on floors to help eliminate any standing water from your floor.
These come in different shapes, all of which should have a strainer. The strainer helps to prevent any foreign objects from entering the drain.
To install a p-trap to a floor drain, you need the following tools:
- A floor drain
- A p-trap
- Glue for pipes
- Pipes
- Coupling
Step 1: Install the Drain on the Floor
Start by finding a hole on the floor then cut it so that you can install the drain accordingly. While installing it on the floor, ensure you screw the drain properly in place.
Ensure the extension is well fitted through the hole and that it also extends to that floor underneath.
Step 2: Install the Extender Pipe to the Drain’s Assembly
Right after you have confirmed that the drain is properly installed on the floor, proceed to the extender pipe.
Install it to the drain assembly. For you to do this accordingly, start by cutting a section of the pipe. Ensure that you make a square shape cut on it.
Step 3: Smear Glue on the Pipe
Get the glue and smear it on the inside part of the coupling. Use more of it on the pipe that’s extending below the floor. Combine the two pipes and firmly hold them attached to each other. Do this until the glue is set.
Step 4: Install the P-trap
When the glue is properly set, proceed to install the p-trap. Begin by identifying the straight line extending from the set drainpipe and your house’s drainage system as well. These two will eventually have to be connected.
Step 5: Connect the P-trap to the Drainage System
Pair your p-trap to the drainage system as well as the already set drain pipe. This p-trap should follow a straight line.
You can then glue together both sections of the p-trap. Do this ensuring it’s pointing in a straight line from the eventual line of the drain.
Step 6: Install the Pipe
To complete this installation process, cut the drainage pipe’s end point then install the pipe to the tee.
It is important to ensure that your floor’s drains have been piped with p-traps as this creates a water seal.
The water seal facilitates easy drainage while preventing odors that could come from the drain. P-traps ensure dirt from the floor accumulates faster and the drain clogs easily.
When you are purchasing a floor drain, make sure you get one that allows both sand and dirt to settle properly without getting carried into the drain pipe.
How to Connect Sink Drain to Wall Pipe
The following process should be followed when connecting your sink drain to the wall pipe.
Step 1: Connect Tailpiece to the Strainer
Start by connecting the tailpiece to your kitchen strainer. While doing this, ensure the threads are properly aligned to the kitchen sink strainer’s threads. Tighten it in a clockwise direction.
With a drainpipe, fix the tailpiece. Ensure you insert a rubber gasket to the drainpipe to ensure the seal is watertight and that the tailpipe is well connected.
Step 2: Install the P-trap to Connect the Drain Pipe from the Sink to Wall Pipe
To do this, slide the shorter side of the p-trap you’re using to the tailpiece. After this, rotate this p-trap ensuring you’ve properly aligned the trap arm with the wall drain fitting.
Step 3: Cut the P-Trap
Use a hacksaw to cut the p-trap. This will help you in adjustment if the arm is below the wall fitting and you’re unable to move the drainage pipe higher.
Once the trap is properly aligned, fix it to the wall drain ensuring it’s aligned to the trap’s u-shaped portion.
Step 4: Tighten the Slip Nuts
Tighten the slip nuts found on the wall drain once everything is properly aligned so as to complete the process.
If you notice that the wall drain is too far from the sink, consider getting an extra pipe to help connect the p-trap to the wall drain.
How to Install a P-Trap Under a Kitchen Sink
P-traps are essential parts of a sink that prevents wastage formation further in your drainage system. It connects with the tailpiece on the side of the sink and the trap arm on the other side that goes into the wall or drains. If you’ve bought one and are looking to install it yourself, here are the steps to take.
- At first, start by inserting the p-trap into the tailpiece. The side of the p-trap that goes upward will go into the tailpiece and connect with the sink.
- After attaching, see if the other end of the p-trap is aligned with the wall drain. This is called the trap arm.
- If the trap arm is lower than the drain, you can increase the p-trap height by pushing it further into the tailpiece on top. If it reached the limit and doesn’t go further, you can cut out a small portion of the tailpiece with the help of a hacksaw.
- If you find out the trap arm is higher, release the p-trap a bit from the tailpiece to get more length. You may need to buy a longer one if it still doesn’t reach the wall drain.
- After properly aligning the trap arm to the wall drain, you can fix that joint with the slip nut.
- Push the trap arm into the wall drain and let it go inside. Similarly, like before, if the trap arm length is insufficient for the wall drain, you may need to purchase longer ones. And if there’s an excess length, you can just cut it out.
- Now that you have the proper length and alignment of the drain fitting, you can fix this end with slip nuts too.
- Lastly, run some water through the sink to check if there’s any leakage and test its strength.
What is the Name of the Fitting That Connects the P-Trap to the Drain?
Trap arms are used to connect the p-trap to the drain. It’s a part of the p-trap itself. But if we need an extension to connect them, we can use trap adapters.
Trap adapters come with jubilee clips to hold and fix one end with the trap arms of a p-trap and the other end with the drainage pipes. They can be used for different materials as well.
We can find them for various trap and drain pipe sizes. If you have a p-trap that is too small to reach the drain, instead of buying a new one, you can use these trap adapters.
How Do You Attach a P-Trap to a Tailpiece
The tailpiece is the part that attaches the p-trap to the sink. So, it’s important to have a proper joint in that segment. You may need to do some basic measurements but it’s not very complex. Let’s see how you can attach the p-trap to the tailpiece.
- Shut off any water flow through the sink by turning off the tap. Then, remove any old p-trap if it exists. Make sure to keep a bucket under the pipes because excess water will come out once removed.
- You need to have the proper dimensions to attach the p-trap perfectly and vertically. You can use a ruler to measure the height from drainage.
- Now that you have the length, take a hacksaw blade to cut down excess lengths from the tailpiece. Keep some extra so that you can insert the p-trap into it.
- Remove the nuts and flanges from the p-trap to open up the passage. Then, slide it towards the tailpiece. Make sure the diameter is appropriate. If it’s loose, use the smaller diameter ones.
- Slide the p-trap to such height that it sits just a bit higher than the drain.
- Screw the joint and tighten the nut to get a firm joint with zero leakage.
- By now the p-trap should face the drain at the correct height. You can attach the waste trap to the drain similarly with joints.
- If some of your dimensions are larger, you can cut down extra bits using a hacksaw. If they’re smaller, you can use a trap adapter to negotiate.
How to Connect 1 ¼” Sink Drain to 1 ½” P-Trap
Older sinks and bathroom appliances often came with 1 ¼” drains. On the other hand, p-traps are usually found in 1 ½” configurations for kitchen sinks for better flow rate. So, you can’t directly attach one with the other. You have to use a pipe adapter or reducer to attach them.
Pipe adapters come in various sizes according to your need. You may choose pipe reducers because they offer better leakage protection than simple pipe adapters. You can find the exact pipe reducer according to the dimensions, 1 ¼” to 1 ½” adapter.
These reducers have internal threads that match drain threads. You need to place the adapter between the trap and the tailpiece. Match the adapter with the drainage pipe. For example, using PVC if the drainage is also PVC is recommended.
After attaching, you can either use threads to fix it or by cementing it in place. PVC cement is a good choice if threading is an issue. However, you should dismantle the pipes before cementing them for better accessibility.
You can also use these adapters on bathroom sinks. For higher flow areas, you may need to fit in a larger drainage pipe to prevent flow difficulties. At last, check for any leakage and you’re good to go.
What if New Sink Drain Doesn’t Line Up with the Existing Pipes
When you buy and place a new sink, it often doesn’t have the best alignment with the existing pipes. In that case, you can easily change the dimensions by slipping the pipes inward more or cutting them down according to their lengths.
If you need to increase the length horizontally, you can try sliding the pipe just a bit outwards. If it’s not enough, you can use pipe adapters to get some extra length. For vertical length, you can increase the tailpiece length with extensions.
If you need to decrease the lengths, it’s easier. You can just cut down the pipes in small increments and then try the fittings to see if they’re properly aligned. In this process, you don’t need any extra parts like pipe adapters.
Wrap Up
Attaching a p-trap to a sink drain pipe is highly important. The steps are easy to follow whether you choose to go with a floor drain or a wall drain for the process.
If you still feel like you are not confident enough to do it yourself, don’t risk it. Just a single error could ruin your home’s carefully created plumbing system. A plumber may come in handy instead.
However, through this guide, the sink p-trap should be connected to the drain pipe perfectly.