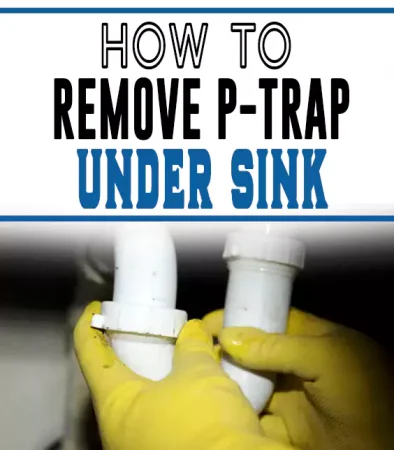
Like any other plumbing fixture, P-traps can become blocked and need to be cleared out occasionally. Here’s how to remove a p-trap under the sink.
If the P-trap is badly clogged, it can cause water backup in the sink and overflow onto the floor. In order to dislodge the blockage and clear the drain, you’ll need to remove the P-trap.
There are a few different ways to remove a P-trap under the sink, but the most common and easiest is to simply remove it by hand. P-traps are often designed to be easy to access and remove, which is why they are often installed underneath sinks.
If your P-trap is clogged and preventing wastewater and sewage from flowing into the sink drain, then removing the P-trap may be your best bet. In this guide, I’ll guide you on how to remove a p-trap under a sink.
4 Steps To Remove A P-Trap Under Sink
Required tools:
- Bucket
- Masking
- Cleaning brush
- Channels lock pliers
- Wrench
- Rags
- Duct tape
1. Finding the P-trap
The sink pipe is shaped in form of “P” and can be found beneath the sink. You can find the p-trap between the tailpipe and waste pipe. The tailpipe has a direct connection to the sink, but the waste pipe is connected to the wall.
2. Place a Bucket Beneath the Sink Trap
You must clear the space beneath the sink. There is a high possibility that spillage will happen which can disrupt your work. Therefore, the best thing to do is to place a bucket and under sink cabinet mat below the p-trap before you unscrew the pipe.
Unscrewing the pipe is not difficult except if you haven’t serviced the plumbing in a long time. You can apply a little lubricant to the trap if it is sticky so you can easily pull them apart.
3. Loosen the Metal Slip Nuts by Hand
Start to loosen the slip nuts located at each joint of the U-pipe. You can loosen it using a wrench, but use your hands to unscrew it when the nuts are loose.
There are cases where the sink trap is designed with a metal finish, in such a case, a strap wrench will be perfect to unscrew the metal slips so that there won’t be scratches. A duck tape placed on the wrench parts that are in contact with the pipes can also prevent scratches.
4. Remove the Sink P-Trap
As you begin to remove the sink p-trap, you must find where the 0-ring is located. There are usually two located on both sides of the p-trap, keep them in a safe place.
There is a connection between the sink trap and the tailpipe, the 0-ring mainly seals this connection. Make sure you snap the sink trap before you disassemble it so that you can reassemble it correctly.
How To Remove The P-trap Without The Wrench
Step 1 – Remove all the items beneath your sink
The first step is to clear the items kept under the sink and move them to another place so that you properly place the bowl or bucket below the p trap to receive water.
Step 2 – Unscrew the cleanout plug
The clean-out plug is located at the lowest part of the p trap. Use a pair of pliers to unscrew it counterclockwise. After removing the clean-out plug, allow the lost objects and excess water to drain into your bucket.
Step 3 – Unscrew the slip nut
The slip nuts hold the p trap, unscrew it counterclockwise using either your hand or a pair of tongue and groove pliers to do this. The two nuts must be unscrewed, only then can you remove the p trap. One of the slip nuts is connected to the tailpiece while the other nut is connected to the drain line
Step 4 – Remove the p-trap
Now that you have successfully unscrewed the slip nuts, you can now remove the p trap, by pulling down a p trap section connected to the tailpiece. After you do that, then you can easily pull out the other section connected to the drainpipe.
How To Clear The U-Pipe
Solid objects can get stuck in the U-pipe because of their shape, and this causes blockage in the kitchen sink drain. Once this happens, you must first dislodge the blockages, then get a homemade drain cleaner, one cup of vinegar, 4 liters of hot water, and a half cup of bicarb soda.
Use the mixture to flush the drain repeatedly if it is necessary. It will clear all the build-up and solid objects blocking the drain in the U-bend. Once this is done, clean up the P-trap using a bottlebrush.
After clearing the blockage, ensure you check the connections because it is not enough to only dislodge the blockage or clean the grime. This won’t prevent the issue from reoccurring soon.
You must make sure you check the pipe and confirm that what caused the pipe to be clogged is not in the pipe again. Once this has been confirmed, you can proceed to the final step.
The final step is to connect the p-trap to the plumbing system. The most important thing at this stage is that the joints and seals are not old or worn out because this can cause leaks at some point.
How To Clean P-trap Without Removing It
Step 1 – Remove the sink stopper
Before you begin the process of cleaning the p trap, the first thing to do is to remove the sink stopper. Most sink stoppers have a pivot rod attached to them. Locate the locking nut which is below the sink, and unscrew it, then pull the rod out, and remove the sink stopper.
Step 2 – Boil water on the stove
Pour six cups of water into a pot and set it on fire to boil for about 10 minutes.
Step 3 – Pour the hot water down the sink drain
Take two cups of hot water and pour it into the p trap through the sink drain. Then reserve the remaining water for later use.
Step 4 – Pour baking soda into the p trap
You will need to pour 1/2 cup of baking soda down the sink drain which is connected to the p trap and leave it there for approximately 10 minutes. You can even leave it there longer than that, say 30 minutes as this depends on how dirty or clogged your p trap is.
Step 5 – Pour vinegar and hot water into the p trap
Mix a cup of vinegar and a cup of hot water properly, then pour the mixture down the sink drain. Use a wet cloth or plug to quickly cover the drain after pouring the mixture into the p trap. This will stop bubbles of the mixture from coming out of the drain.
Step 6 – Rinse the drain
Pour the remaining hot water down the drain, it will clear the remaining grime or whatever dirt that is left in your p trap. And now, you will have a perfectly clean p trap.
Conclusion
Removing a P-trap under sink is an easy task that can be done with a few different methods. The most common and easiest way to do so is to simply remove it.
By following the steps highlighted in this guide, you won’t have a problem removing a p-trap under the sink. If you have any questions or difficulties, please don’t hesitate to let us know in the comments below.