
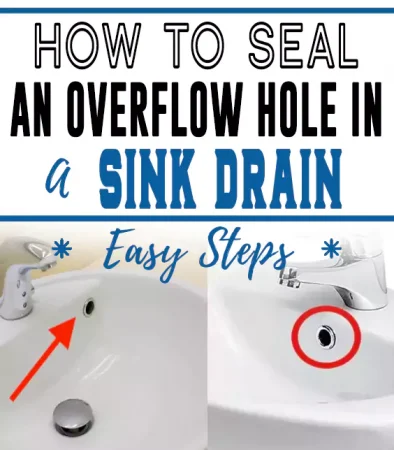
An overflow drain is a small hole located underneath your faucet towards the back of your sink bowl. Here’s how to seal an overflow hole in a sink drain.
The overflow drain works by essentially collecting excess water before it ends up overflowing into the room.
If you accidentally leave the faucet on or if you have any plumbing issues, the drain will collect the excess water.
In case you notice any extra holes in the overflow sink drain, you can seal them. Sealing the overflow drain holes will also prevent the development of mold that would occur if the areas were to remain damp.
An overflow drain consists of both the drain as well as the overflow trap. The process of sealing the overflow drain involves removing old sealants and cleaning out any mold and grime from the sink before applying new sealant.
You should use silicone caulk as a new sealant, and allow it to settle before using the sink again. Below are some detailed instructions on how to seal overflow holes in the sink drain.
How to Seal an Overflow Hole in a Sink Drain
A sink drain is made up of a metal fixture located inside a hole at the tub’s bottom. This drain is often exposed to soap, water, germs, and even moisture known to cause rust or mold.
This is likely to occur if the drain is not properly sealed. It is advisable to seal the drain using sealants such as silicone caulk, something waterproof.
Here are some steps for sealing overflow holes in the sink drain.
Step 1: Remove old sealant
Start by removing any old sealants that are found on the drain. Do this by treating it with a commercial caulk remover. While you are doing this, ensure you follow the manufacturer’s instructions so that you get it right.
Proceed to cut the existing caulk using a utility knife. Do this when it has already softened and then peel it from the seam using some needle-nose type of pliers.
Step 2: Thoroughly clean out grime and mold
It is important to clean all the mold that is already existing as well as the grime from around the drain before you move on to the new sealant for your bathroom sink drain.
Get a bathroom cleaner or even some bleach and apply it to the area that’s affected. Use a rag to wipe it.
Step 3: Carefully get the right amount of sealant
The silicone caulk comes in a tube. You should therefore cut the tip of the tube using a sharp pair of scissors. After you’re done, get a stiff wire and insert it into the nozzle.
The goal is to puncture the seal. Continue to load the tube into the caulking gun but while doing this, ensure the tip faces away from the trigger.
Step 4: Apply the new sealant
Apply just a bead of sealant of about ¼ inches thick or even less into that seam found between both the bathtub and the drain. On the trigger, ensure you maintain steady pressure as you drag the tip of the gun around the drain’s circumference.
Step 5: Smoothen the sealant and allow it to dry
Moisten your fingers and then glide them quickly over the caulk that you have applied freshly. You can also use the back of a plastic spoon or even a craft stick to make the sealant smoother. Allow it to settle and also cure for about 24 hours before you use the sink again.
How Do You Seal Plastic Overflow Drain Hole On Bathroom Sink
Your bathroom drain in most cases works well taking water down the drainpipe. However, every once in a while you will notice a leak right at the bottom of the sink.
When this happens, it’s usually because either the gasket or even the plumber’s putty that secures the drain begins to fail. Here are some steps on how to seal sink drain leaks from overflow holes in your bathroom.
- Get a pipe wrench and use it to loosen the lock nut then remove it. While doing so, hold your drain against the sink’s bottom.
- This will stop it from prying from the top since doing this could deform your drain’s flange. It could end up ruining your sink.
- Remove any existing old sealant from your drain flange’s bottom using a putty knife. Ensure the depressed area that is around the sink drain has no built-up material.
- Get silicone caulk and apply a bead of it around the drain hole found in the sink. Apply another second bead of it. Do this along the drain flange underside.
- Carefully drop the flange inside the drain hole. After this, apply pressure then push the flange down the hole ensuring you achieve a tight seal between these two.
- As you hold down the drain flange from a position above, slide your replacement gasket up. Do this against the sink and then thread the lock nut. Tighten this up using your hand. Grab the pipe wrench and use it to tighten the locknut gently against the sink’s bottom.
- Some of the caulk will be oozing from underneath the flange of the sink. Clean this up thoroughly to stop any staining.
Recap
Plumbing fixtures found in our homes are common sources every now and then for water leaks. It is therefore important to seal or caulk drains to guard them against drainage problems. This also prevents any water damage.
Whichever material you use to seal should be highly dependent on the results you desire and even the position of the drain.
When you are sealing an overflow hole in the drain, the silicone caulk will keep things more secure. This is because it is waterproof and easily prevents leaking.
The only downside to consider is that when you choose this sealant for the job, removing it isn’t easy. You will require a scraping tool to take it off in case you are doing repairs next time.
I’ve covered the whole process from start to finish, so you can know exactly what to do when a sink drain starts overflowing.