
An outdoor faucet is a great way to have a water supply outside, but you need to secure the outdoor faucet to brick.
An issue with the spigot is that if it’s not properly secured to the wall, it pulls in and out, allowing water to drip into the wall.
An outdoor faucet is a great option for watering your garden or washing your car. However, you need to know how to secure the outdoor hose spigot to brick.
The pipes need to be sturdy enough to hold the faucet. Plus, drilling anchor holes too close apart will crack the brick wall.
How to Secure Outdoor Spigot to Brick
Things You’ll need:
- Tape
- Hose Bib
- Screws
- Masonry drill bit
- Drill hammer
- Caulk
- Tubing cutter
- Bucket
- Adjustable wrenches
- Sealing tape
- Flux
- Propane Torch
- Emery tape
- Copper Tape
- Propane Torch
Step 1: Choosing the Location
Select where you want to install the spigot. You should choose a location that makes it convenient to use the outdoor faucet. Plus, the location you choose should be close to a cold water line.
Step 2: Drill the Hole for the Spigot
Make a hole in the exterior side of the wall. Use a spade bit that has a larger diameter than the faucet piece. When drilling, make sure the drill is at an angle so that the hold will face downward.
This ensures that water will drain out whenever the faucet is turned off. Make sure to use a masonry bit that’s appropriate for bricks or any other material you use.
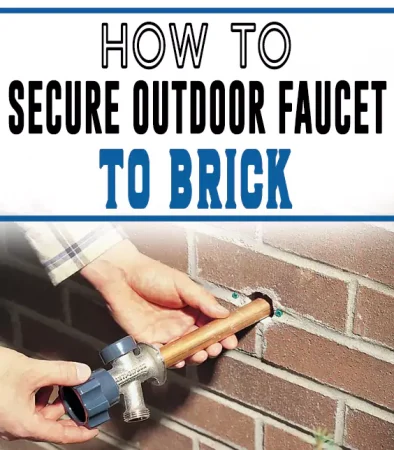
Step 3: Fixing the Spigot
Hold the faucet piece in one hand, and wrap the sealing tape around the faucet threads with the other hand. Attach the female iron pipe to the copper sweat adapter by weaving it.
Holding the faucet, tighten the adapter with an adjustable wrench. Make the adapter tight by turning it at least two full turns.
Step 4: Apply Silicone Caulk to Secure the Faucet
Take the silicone caulk and apply it to the back of the faucet flanges. Fix the faucet into the hole.
Make sure the faucet’s spout is pointing downwards. Shim the surface to make it even. Screw the flanges to the wall. Drill holes and use anchors.
Step 5: Mark the Areas to be Cut on the Pipe
Hold the copper tee to the supply line for the water. Mark two areas on the pipes that would be used for cut lines. Make sure to leave enough space on the pipe so that both ends can enter the copper tee.
Step 6: Cut the Pipe
Close the water supply; Use a bucket to catch any leaking water. Taking the marked pipe, use a tube cutter to cut the pipe at the marked areas. Fix the tee and leave it for a short while to see whether it holds.
Take the tape and measure the spacing between the tee and the adapter attached to the faucet. Using that measurement, cut a piece of pipe to fit between the tee and the adapter. Fix the pipe momentarily and make sure it enters smoothly.
Step 7: Prepare the Pipe and the Tee for Soldering
Remove the tee and the pipe; Using emery tape, clean all the sides of the pipe, and the insides of the tee and adapter.
Assemble all the pieces, applying soldering flux to the ends along the way. Ensure that all the parts fit properly.
Step 8: Fix all the Pieces and Solder them Together
Using the propane torch, solder each connection. Use a damp rag to wipe off extra flux once you’re done soldering.
You can attach some copper straps to it to provide extra stability. Allow the entire piece to cool off first. Then re-attach the valve to the faucet.
How To Install a Frost-Proof Hose Spigot
In the winter months, temperatures can get very low. Especially at night. During an overnight freeze, the water within your outdoor spigot expands until the pipe bursts.
The best way to prevent this is to install a frost-proof spigot.
- Select a spot for the spigot. You should be able to reach the other side of the selected area from the inside. Plus, the area should be close to a cold water pipe
- Using a drill, make a hole about 1 inch in size on the side of the wall. If you are drilling into stucco, then use a chisel and hammer to chip through it. When done, use the drill to make a hole through the plywood.
- Take the frost-proof faucet and put its valve end through the hole. Fix the faucet to the sides by driving screws through each hole on the sides. Add caulk to the perimeter to seal it.
- Close the water coming into the cold water pipe. Cut the pipe and drain the water.
- Solder a copper tee to the pipe. Make sure its outlet is facing the frost-proof faucet. Arrange a copper pipe with fittings to allow the water to reach the faucet from the tee. Assemble the parts of the water line together, and apply soldering flux at the joints
- Solder together each joint in the newly assembled water line. Close the faucet, and open the water to make sure they aren’t any leaks
How to Seal Around Outdoor Faucet
Step 1: Clean the faucet
The first thing to do before sealing the outdoor faucet is to clean the dirt around it. Soapy water and a soft cloth will be useful in removing the debris that has accumulated within and outside the faucet.
Applying a sealant around your outdoor faucet without cleaning it won’t make the new sealant solid around it, therefore, it is essential you do this if you must replace your old sealant with a new one.
Step 2: Decide the sealant to use
However, there is a strong debate between plumbers’ putty and silicone but it comes down to personal choice.
While it is better to apply silicone sealant on a porous countertop so that there are no stains, I recommend plumbers putty because it is easy to clean and requires less maintenance time, meaning you can use your outdoor faucet immediately after applying the sealant around it.
Step 3: Apply the Sealant
Roll one piece of plumbers putty around your hands until you form a soft rope, make the rope 3 inches thick.
Attach the newly formed putty ring at the base of your outdoor faucet around the edges and apply a substantial quantity of plumbers putty so that the edge of the outdoor faucet base can be entirely covered with the sealant.
If you decide to use a silicone sealant, follow this same procedure.
Step 4: Install the faucet for use
Install the outdoor faucet by attaching it to the countertop and ensure you tighten it. It may be necessary to clean the excess sealant around the faucet.
You can do this by using a clean rag or putty knife. As stated earlier, you can start using the faucet immediately if you applied plumbers’ putty sealant.
But if you applied a silicone sealant, you will have to wait longer, the general curing time takes at least 24 hours, after this period, you may use your outdoor faucet, refer to the silicone sealant instruction to know how long the curing time will take.
Conclusion
Some of the benefits of having a secure outdoor spigot include; washing your car and watering your garden.
However, investing some time and effort in anchoring the outdoor faucet to a brick wall is an absolute must if you want to avoid damaging your wall while you enjoy those benefits.
Invest in a frost-proof hose spigot if your area usually has very low nighttime temperatures. Or you live in an area with strong winters otherwise the water in your house can get frozen.
Make sure to follow all safety precautions if you would be doing it yourself. Following this guide for securing an outdoor spigot to brick will save you lots of time.