Needing to know the bathroom sink drain rough-in height? Here is a complete guide to measuring and every you need to know.
Generally, a rough-in height for a bathroom sink drain is approximately 20 to 24 inches from the floor.
Certain terminologies get used when describing the rough-in measurements of the bathroom sink drain. It’s, therefore, essential to understanding them first before jumping into explaining the various measurements.
Connecting the bathroom sink drain is crucial for sink installation. When you purchase a bathroom sink, check the manufacturer’s product manual to know how high should be the sink drain.
RELATED: How High Is The Kitchen Sink Drain Rough-In Height?
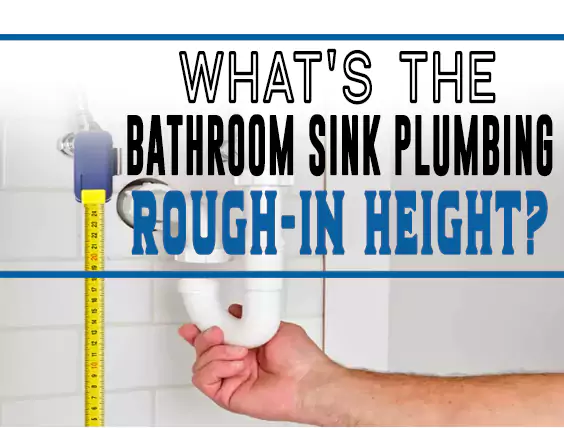
What’s The Bathroom Sink Drain Rough-In Height?

The rough-in height for a bathroom sink drain is 20 to 24 inches from the floor. But to allow enough space for P-Trap and other connections, most rough-in heights have 24 to 28 inches.
The water supplies come a few inches higher. Plumbers install the water pipes at the side of the sink drain lines. Fortunately, most manufacturers make bathroom sinks compatible with these heights.
When installing a bathroom sink, you undergo two stages. The first stage is easy and entails setting the sink to its position.
The second stage is the connection phase, also known as the rough-in. It entails the connection of various parts, which come in various measurements.
The bathroom sink installation will flop if you use the wrong measurements.
What Should be the Bathroom Sink Drain Rough-In Height from the Floor?
The market has many bathroom sink designs and sizes. But an average bathroom sink comes with an 8 inches depth and a 32 inches counter height.
If dealing with this kind of bathroom sink, its sink drain should be approximately 24 inches from the bathroom floor.
But you should do its rough-in plumbing at a lower height of about 20 to 24 inches. Here’s why – it allows enough space for the bathroom counter, P-Trap, sink, and other connections.
Bathroom Sink Drain Rough-In Height with Garbage Disposal
The dimensions of bathroom sink garbage disposals vary. It depends on the number of people using the sink and power supply.
The bathroom sink drains rough-in height with a garbage disposal should be between 24 inches and 28 inches. But if it has a garbage disposal, the building codes do not limit the height.
The rough-in height with garbage disposal can vary slightly from the standard measurements.
Bathroom Sink Drain Distance from the Wall
The distance between a bathroom sink drain from the wall should not worry you. There’s no set distance to maintain. Any distance is okay as long as you can connect the wall with the bathroom sink drain.
Is your bathroom sink drain height correct? Thankfully, you can adjust the height. You only need to know the required measurements and adjust the sink.
First, remove the bathroom sink with the wrong drain height. With the right drain height in mind, start the right measurements of the bathroom’s sink rough-in dimensions.
While doing so, consider P-Trap’s space. Therefore, you should leave a 24 – inches space or less below the drain.
If installing the sink for the first time, you can modify the drain’s depth and height to fit the correct measurements.
How to Measure Bathroom Sink Drain Rough-In Height
Step 1: Measure the Sink’s Height
It’s the first thing to do. Use a ruler to determine the height of the bathroom sink. Place the ruler to run from the sink’s top to its base. Then write the results on a piece of paper.
Step 2: Measure the Sink’s Length
After determining the sink’s depth, measure its length. It begins from the point above where the sink starts to curve.
Place a tape measure from that point to the sink’s bottom and record the results.
Step 3: Measure the Width
Place a tape measure slightly above the sink’s bottom and run it straight to the other end to take its width. Take the measurements from the back going forward.
Step 4: Take the Sink’s Top Width
After taking the bathroom sink’s bottom width, it’s time to find out the width of its upper side. Except for the undermount bathroom sink designs, their lips extend from the basins to the countertops. Turn the sink upside down and measure its kip. The results are its top width.
Afterward, measure the sink’s cabinet opening using a tape measure. Begin from the sink’s top left side towards its top right for accurate results.
Step 5: Measure the Size of the Countertop Hole
With the sink’s width in place, find out the size of its countertop hole. Start by measuring its length.
You only need to place the tape measure across the countertop hole’s center. Then take its length starting from the left to the right edge.
For the width size, place a tape measure at the top point of the countertop hole center. Then run it down to the bottom point, parallel to the top point.
Next, take the measurements and record them on paper.
Step 6: Measure the Wideness of the Sink’s Cabinet Opening
It applies only to the sinks with cabinets. If it doesn’t have one, you can skip this step.
Take the tape measure and place it on the top of the right corner of the cabinet opening. Then run it to the other side, which is the top left corner. Put down on paper what you get.
You can know the sink drain height to use with the above measurements. It could be the standard height or those recommended by the manufacturer.
If the drain rough-in height does not fit any of them, you can adjust it to the correct size.
For best results, you need to consider the following factors when taking the measurements;
Considerations Need To Be Taken for Sink Drain Rough-In Height Measurements
The Sink Drain Measurements
Before installing a bathroom sink, you’ll have prepared its space. You need to be sure the space reserved is enough for every sink part.
Generally, most sinks come with a drain depth of 8 – inches. Other sinks come with a longer drain. Before roughing-in the sink’s drain, you need to be sure it will fit in the space you’ve reserved for it.
You’ll need to measure the sink drain size and the space available for its installation. The bathroom sink’s height will determine its rough-in height.
Bathroom Counter Height
It’s another vital feature to consider when determining the bathroom sink drain rough-in height. The hot and cold lines and other pipes serving the sink shouldn’t interfere with the drain.
Ensure they sit in their correct places. Otherwise, they will cause improper roughing-in of the sink’s drain.
The P-Trap Location
According to the International Residential Code, a sink’s P-Trap should be 28 – inches below the sink. Otherwise, it will interfere with the rough-in height. You should fix the sink height that will allow you to install the P-Trap easily.
Bathroom Sink Plumbing Rough-In Measurement
Center or On-Center Line
It’s an imaginary line that runs vertically from the drain pipe. You don’t draw the line between the edges of two drain pipes or the beginning of key references. You do it from their centers.
Base Floor Height
It’s a recent terminology used in recent construction activities. The term means the finish flooring of your remodeled bathroom floor to the plumbing point.
But if constructing your bathroom for the first time, Base Floor Height means starting from the subfloor. Mostly, the floor set gets made of stone.
But you’ll find some bathrooms made of other materials. Therefore, the measurement guidelines given here are general.
They may differ based on your bathroom type. Thankfully, most bathroom sink manufacturers give a guideline manual. You can check them for the precise dimensions to use.
Bathroom Sink Plumbing Rough-In Dimensions
Vertical Measurement
It entails the length of the supply lines running vertically to the bathroom sink. You can also call it the height of the hot and cold supply lines connecting to the sink.
The two holes for the supply pipes should be 2 – inches to 3 – inches higher than bathroom sink’s drain pipe.
Horizontal Measurement
It’s the size of the hot and cold supply lines that run horizontally to bathroom sink. The supply lines should have a hole of 4 –inches each.
One hole should lie on the right of the centerline and the other on the left.
Drain Hole Measurements
A bathroom sink’s drain or discharge hole height should be approximately 20 – inches long.
There should be no distance from the back of bathroom sink’s back wall to its drain hole.
Consider the drainpipe as the vertical centerline when determining a bathroom sink drain height.
Fixture Measurement
The minimum inches a side to side bathroom sink buffer can be from the centerline is 15. Otherwise, the recommended size is 20 – inches.
The front bathroom sink buffer should be in a position that does not obstruct you. That’s why a minimum of 21 – inches gets recommended. But the best measurement of a front buffer from the centerline is 30 – inches.
Sink’s Position
The position of bathroom sink from its rim to the floor should be approximately 31 – inches. Fixing it higher than this will strain the user.
Installing it below the standard heights may leave insufficient space to fix the P-Trap and the hot and cold water lines. And if you do fix them, they may touch the floor, making them prone to disturbances. As a result, they can easily damage or spoil.
It’s crucial to know the right sink drain height and learn how to fix it correctly because it determines whether you get your installation approval.
How Does Drain Height Impact the Permit Process for Sink Installation?
During the sink drain rough-in installation process, you need to make all the connections properly. All the pipes should pass through your bathroom or kitchen floor as required. When through, your local inspector inspects your work for safety.
You get approved to do the final sink installation touches if all is okay. When you finish, the inspector comes again to inspect your final work.
If you’ve finished as per the required standards, you get approval. If not, you’ll need to work on what you’ve done wrongly. The inspector will only approve your sink for use when you’ve met the required installation standards.
How Do You Rough-In a Bathroom Sink Drain?
Step 1: Draw a Bathroom Plumbing Diagram for Rough-In Drain
The easiest way to begin the rough-in process of bathroom sink drain is by creating its layout. Include all the measurements. Begin with bathroom sink’s height and depth.
These measurements will help you buy the materials of the required size.
Step 2: Collect All the Required Materials
With all the required measurements of bathroom sink drain, acquire all the necessary materials for the procedure. You’ll require;
- A small segment of PVC pipe that fits the sanitary tee or the drain pipe tee
- Marvel connector
- P-Trap kit
- Tailpiece extension
- Beveled washers and a nut
- PVC cement
- Teflon tape
- channel lock pliers
Step 3: Check if the Pieces Collected Fit
After collecting all the materials you need for the job, assemble the pieces and join them. Don’t tighten them tightly or use glue. You are doing so to see if they fit.
Step 4: Create a Stub Out
If the pieces fit into each other correctly, proceed to create a stub out. Begin by fitting the PVC segment into the drain tee in the wall. Then add the marvel connector to the protruding end of the PVC segment. The stub out is complete.
Step 5: Attach the P-Trap to the Stub Out
With the stub out in place, connect the P-Trap. Start by preparing the trap arm found in the P-Trap kit. Take a nut with threads facing down and slide it down to the end of the trap arm. Then slide another nut with the threads facing the opposite end of the trap arm.
Then add a washer, and make sure the taper sits towards the end. Then fit the trap arm into the marble connector loosely. Don’t tighten the nut.
Next, connect the P-Trap to the trap arm. Then loosely thread the connections into place. Then take a nut with its threads facing down and slide it up the tailpiece on the sink drain. Afterward, hold the nut into place and slide the right size washer onto the sink’s tailpiece. Ensure the taper faces down.
Then move the P-Trap aside and slide the tailpiece extension over the sink tailpiece. Secure it in place loosely. Finally, connect the tailpiece’s bottom extension to the P-Trap.
Inspect the fit of each piece to ensure you don’t have to adjust or modify anything. Some tailpiece extensions and trap arms come in larger sizes than required. So you need to cut them to size.
When everything is okay, proceed to the next step.
Step 6: Attach the Parts Permanently
Now that you’re aware all the parts fit and connect correctly, disassemble the connections. Then apply adhesive inside the drain tee’s opening.
Do the same to the stub-out pipe’s end and insert it into the drain tee opening. Then turn it slightly to spread the cement.
Repeat this process with the marble connector’s inside and the stub out’s outer end. Then reassemble everything else as you had done before.
But this time, wrap the threads with Teflon tape. It takes only a few wraps. Just enough to give a solid seal when turning the nuts.
Then tighten each nut with your hands until snug. When through with the connections, tighten each union with channel lock pliers. Avoid over-tightening as you can ruin the threads.
Step 7: Test the Sink Drain
After securing the connections, test the plumbing procedure. If it was successful, turn on the water and fill the sink. Then drain the sink while you look for any leaks. One attempt may not be accurate. Repeat several times.
Once the connections become properly sealed, you can start using the sink. And most importantly, you have done the procedure successfully!
You can rough-in sink drain through the wall or floor. What’s the difference? Let’s check out.
Rough-In Sink Drain through the Floor Vs Wall
Though most sink drains connect through the wall, you can also rough it n through the floor. In certain situations, a rough-in sink drain through the floor could be only option.
The procedure could be a cinch or tricky. It’s therefore essential to know what option suits you best, whether roughing sink drain through the floor or wall.
What’s essential for both connection types is for the sink drain to tie in with your home’s drain system. If the structural joists of sink lie behind the wall, then your local inspector will have you rough-in sink drain through the floor.
Piping access is crucial when roughing-in sink drain. It’s okay to rough-in through the floor if it’s easy to access the piping system.
The same case applies to the walls. It will save trouble when replacing or repairing the sink drain in the future.
Rough-in a sink drain through the wall is a snap. It’s no different from doing it through the floor except that you’ll have to raise the water pipes.
You’ll also have to deal with the concrete floor and floor joists. It will, in turn, increase the amount of work, time, and money to spend on the procedure.
Space is crucial when roughing-in the bathroom sink drain. That’s why the sink level from the ground matters. And how high should a sink be? Let’s find out;
How High Should a Bathroom Sink Be?
Several factors such as preference, sink design, intended use, and plumbing location affect where your bathroom sink should get positioned. It could sit anywhere from 29 to 36 inches. In the olden days, bathroom sinks got positioned approximately 32 inches.
The height of the sink’s P-Trap in relation to its drain pipe also matters. Which one should appear higher? Let’s find out;
Can a P-Trap Be Higher than a Drain Pipe?
No. A P-trap should be attached directly to sink drain pipe. If it goes below the drainpipe, water will not flow down easily and may splash outside the sink.
The water inside a P-Trap should go down naturally through gravity. Also, a low-installed P-Trap makes the water inside evaporate. As a result, sewer gas may flow up the P-Trap, producing a bad smell.
What do you do when your sink’s drain height is not right? Let’s get right into it;
Can Bathroom Sink Drain Height Be Adjusted?
Yes. If smaller or higher than the required height, you can adjust it. Use an extension tailpiece to increase its height for a short sink drain. Measure the height difference and use an extension tailpiece of the same height. Use retention nuts and the correct size washer to connect the joints.
For a bigger than required height, do the opposite. Measure the required size of the tailpiece that joins to the T-Trap. Then cut out the extra part and connect the remaining piece to the T-Trap.
What if the T-Trap is lower than expected? Here is how you adjust it to the required position.
How To Make the T-Trap Higher
Step 1: Collect the Required Tools
First, assemble all the materials you’ll require for the task. You’ll need;
- A tape measure
- Trap adaptor
- A piece of paper and pen
- ABS OR PVC pipe piece
- ABS cement
- A hack or hand saw
Step 2: Put the Trap Adaptor into the Tailpiece
After acquiring everything you need for the job, begin the process by connecting the trap adaptor to the tailpiece. Ensure it sits in the middle of the tailpiece to make it easier to adjust to the correct slope.
Step 3: Measure the Distance between the P-Trap and the Trap Adaptor
Then take a tape measure and measure the distance from the sink P-Trap to the trap adaptor. Record findings on a piece of paper. Next, take a hack saw and cut the ABS pipe to the exact measurements you’ve recorded. In the absence of a hack saw, you can use a hand saw.
Step 4: Connect the ABS Pipe Piece to the P-Trap and Trap Adaptor
After cutting out the ABS piece, connect it to the trap adaptor and the P-Trap using ABS or other suitable cement.
First, remove the trap adaptor from the tailpiece. Then apply ABS cement to the opening to connect with the cut ABS pipe. Insert the ABS pipe to assemble the two parts. Then connect these joined parts to the securing nut around the sink drain hole by snugging it with your hands.
Step 5: Connect the P-Trap with the Wall Drain
The wall drain and sink drain offset each other. You, therefore, need a 45 fitting to divert the drain angle towards the sink drain.
To do this, insert a 45 fitting on the wall drain pipe. Ensure they align. If the wall drain is short and the P-Trap does not connect with the 45 fitting, increase the length of the drain wall.
Measure the size of the drain pipe you need to add and cut it from a pipe piece similar to the wall drain pipe. Then fix it into the drainpipe using glue.
Then insert the 45 fitting and secure it using glue. Next, connect it to the P-Trap using reliable glue. Then tighten the securing nuts.
The wall drain pipe should have a ¼ range slope. After finishing all the connections, check whether the drainpipe slopes as expected. If the drain is flat, loosen the slip joint and raise it by ¼ range.
That’s it. You’ve successfully raised your sink’s P-Trap.
Conclusion
According to the plumbing codes, the bathroom sink drain rough-in height should be approximately 24 inches. It’s the best height that allows proper drainage.
Some sink drains come with higher or lower heights than the standard height. You can adjust the height to fit the required size, as explained above.
Knowing the required sink drain and how to get the measurements will make the adjustment process easy and successful.
You can rough-in bathroom sink drain through the wall or floor. It depends on your preference and the bathroom’s piping system.
Whichever way, ensure you install the P-Trap correctly and in the right position. Otherwise, water may not drain well, and the bathroom sink may start emitting a bad smell.