
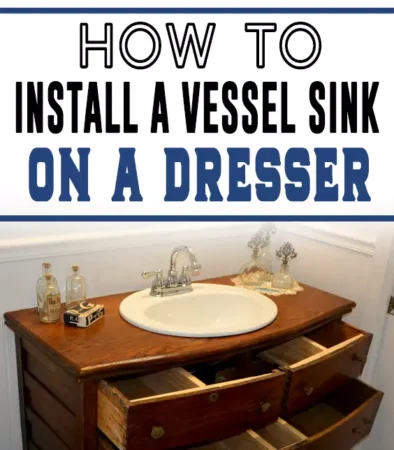
Did you know that installing a vessel sink on your dresser is a lot easier than it seems? Step-by-step guide for how to install a vessel sink on a dresser.
It looks difficult no doubt at first look but when you start doing it, you are going to be surprised. However, you will need to buy some tools before you install a vessel sink on your dresser all by yourself.
You will be turning furniture into a bathroom vanity just like that without seeking any help from a professional.
The guide is made to teach you how you can put a sink on your dresser, and bring more ease to your life. Yet, you should be careful and follow the guide without making any mistakes, only then you will have the best results.
Furthermore, a vessel sink can portray a nice look in your bathroom, this is something you must try. Instead of buying a new sink you can just install it on your furniture and save money.
Can You Adjust the Vessel Sink on Any Type of Cabinet?
Surely it’s possible, but you need to think of a comfortable height for your sink. The ideal size that we recommend for a vessel sink is 36 inches. You can increase the height but more than 36 will make it hard for the children to use the sink.
Aside from that, your dresser or cabinet should have enough space for the drain to fit in. It’s important to have an ideal size cabinet for sink installation. Because the fitting is not right, the sink might cause trouble and you might have to reinstall it.
As long as your cabinet is capable and provides the necessities that a sink requires, you can use it.
Benefits of Turning a Dresser Into a Bathroom Vanity with Vessel Sink:
There are hidden benefits that you can’t see until you have a vessel sink on your dresser. People install sinks on their dressers for a lot of reasons. Here are some that convinced me to write this guide.
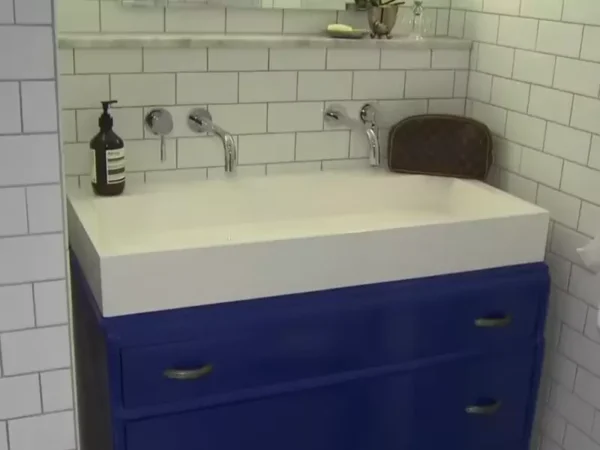
The Look
Despite the architecture of your bathroom. Installing a vessel sink on a dresser can make it look very different and pleasing to the eyes.
Aside from all other reasons, this is the most pleasing one. Surely, it brings ease but along with ease, it changes the look of your bathroom as well.
Saving Money
Instead of buying a sink wash basin, you can go for something new and unique. You can just convert your dresser which will save the money that you will spend on installing a wash basin.
More Space
Instead of bringing in another wash basin, you can just install a sink on your dresser. This will result in saving more space in your bathroom. Your bathroom stays comfortable to use and it won’t be covered with a basin and dresser both. So, you will have more space in your bathroom to use.
You will find more benefits once you have your dresser made into bathroom vanity.
How to Install a Vessel Sink on a Dresser
Now, when you are ready to proceed with installation here’s what you need to remember before doing so. The installation will go smoothly and without any problems, if your dresser provides the requirements that a sink requires.
You must pick an ideal height of 36 inches to the top of your sink. If you have a bowl-shaped sink you should consider using a taller faucet which is best for vessel sinks.
Importantly, if you already have a vanity installed, you must remove it. If you only have a dresser then you should proceed with the installation shown below.
Tools that are used in this guide
- Stud finder
- Hole Saw drill
- Measure Tape
- Shims
- Silicone Caulk
- Hacksaw
Step 1: Measuring the Height

Before you install the vessel, it’s important to measure the height and width of your vanity. Use the stud finder to mark and locate the wall studs on the top of your marked area.
Step 2: Drill the Hole for Plumbing

The best way to transfer your plumbing spots from the back of your vanity to the wall is to measure tape. Then grab the hacksaw and start cutting holes, make sure to cut a little wider than the size of your pipe.
Moreover, if your dresser has drawers you can make your installation easy by removing the taking the drawers.
Step 3: Posting and Placing the Vanity

Now, we need to make sure that vanity is in right place. Ensure that the back side of your vanity is placed correctly to use the pipe holes that you just drilled in step two. After that, you need to check the height, if it is somehow uneven, balance it by using shims.
Also, some vanities come with flexible heights, if yours is one of those you won’t need shims.
Step 4: Placing and Attaching the Vanity

Moving forward, now that you have your vanity in place, drill through the vanity to the stud or wall. To adjust the vanity to the wall, use screws which are ideally used for furniture.
If you have any method that you are comfortable with, other than using screws, you can go for it.
Step 5: Faucet Installation
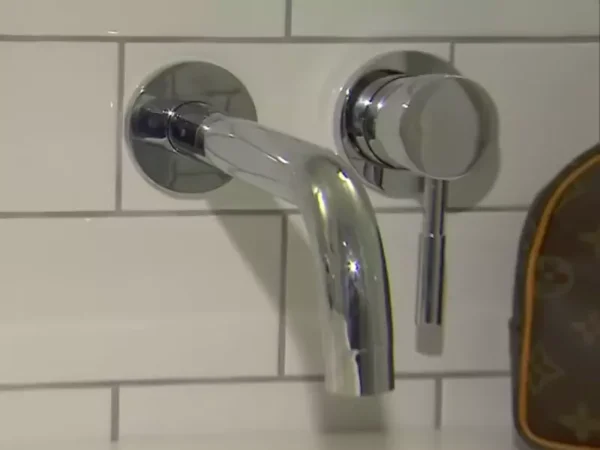
Now the important part is, attaching the faucet to the vanity top before you directly install the countertop.
Importantly, remember to leave the faucet to lose, this helps you make adjustments when you are done installing a Vessel Sink on a Dresser.
Step 6: Placing the Vanity Top and Applying Silicone
Grab your silicone, it’s time to place the countertop. Apply the silicone properly to the left and right and make sure it’s balanced, if it’s uneven countertop might not be stable.
Now place the countertop correctly because silicone is very adhesive. After that, use the caulk on all the joints and then give it enough time to dry.
Step 7: Placing the Vessel on the Vanity
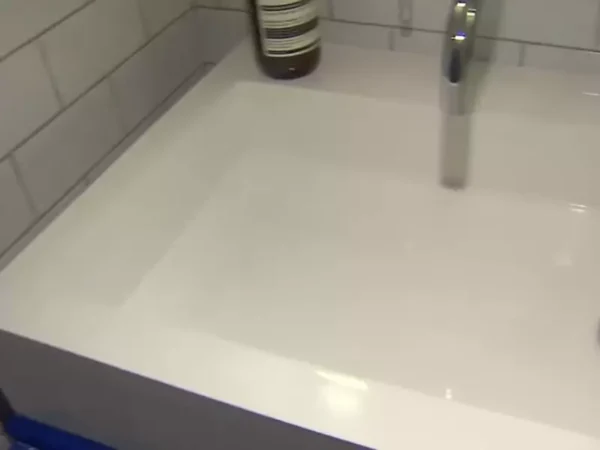
After making sure that the countertop is dried, now it’s time to place the vessel on the vanity top. Use the same silicone for the vessel as well, if it bowl shaped flip it over.
Apply it to the bottom of your vessel and then place it accurately on the vanity top. Once it’s properly attached, you can put a drain in your vessel as well but remember not over-tighten the drain.
Step 8: Plumbing

Now when the vessel is dried and attached, you can proceed with plumbing the dresser.
Remember you can use the hacksaw to cut the tailpiece accordingly to fit. When you are done with the plumbing and cutting, adjust and tighten the faucet.
Step 9: Finalizing
When everything is in place, run the tap water, check the water flow, and check drains for leakage. If you find any leakage, try to tighten the pipes, and try to use low-pressure tap water for some time.
This is the easiest way to install a vessel sink, however, you should have the necessary tools and products. These tools also work great to convert dresser to vanity.
However, these tools won’t be available in every household so you’ll have to purchase them. If you are going to install a vessel sink all by yourself then you might have to spend some bucks on these.
How Do You Waterproof A Dresser Top?
People use different styles and different built types for their dresser tops. Waterproofing depends on the build type of your dresser they will either be made with wood or steel.
However, both can start leaking at some point. Which makes them necessary to fix as they can damage and weaken the dresser. If you have recently installed the sink then it might be an issue with fitting.
You could follow a bunch of methods to waterproof your dresser top but first, you need to observe what’s causing the problem.
Identifying the Cause
The best way to waterproof a dresser is to observe the leakage point. You are likely to have leakage if you have recently converted dresser into vanity, usually, the dresser top is improperly attached.
Fixing the Cause
Use a putty knife to remove the silicone and detach the dresser top. Remove the silicone from the surface of the vanity, and re-apply the silicone. Then properly adjust the top on the vanity. If the issue continues, you might have a damaged or old dresser top that has to be repaired or replaced.
Some dresser tops are made of wood, and water can weaken certain types of wood. Moreover, if you don’t notice any clear damage, there might be little holes on the dresser top which could be causing the leakage.
What Could Be the Reason For An Unstable Sink?
If you notice any movements in your vessel sink after it was repurposed dresser to bathroom vanity. Usually, the moving happens when you convert or you improperly install the vessel sink to the vanity top.
Some sinks are heavy weighted and need to be attached properly otherwise they will not be stable. Follow the quick steps to fix and make the sink stable.
Observing the Cause
Observe, that if the movement is very little then it could be due to the weak attachment of the vessel to the top. If the sink moves when you touch the faucet, it could be because of lose tightening.
Making it Stable
Try to re-use the silicone after removing the vessel sink. Before reapplying see if there is anything wrong with the surface on the top of the vanity. Make sure the surface is even then place the vanity on the new layer of silicone.
Usually, if you did a DIY bathroom vanity from a dresser then there’s nothing to worry about. You can reread the guide and see what have you missed or skipped.
You are not a professional and especially if you are doing it for the first time, you are likely to have little issues like this.
How Do You Secure a Vessel Sink to a Counter?

This depends on the type of countertop you have, if you have a typical dresser and you want to convert a dresser to a vanity silicone is the best way to do it.
This not only secures it to the countertop it ensures a waterproof countertop. Here’s what you can do with silicone.
Using the Silicone
If you have a bowl-shaped vessel, silicone is the best way to secure it to a counter. Flip the vessel, apply it on the back of the vessel and then place it on the countertop.
Also, make sure you place it correctly because silicone is very adhesive. If it’s improperly attached there might leakage problems.
Wait for the Solution
After you have applied the silicone gives the vessel some time to dry and do not use the vessel for a while. After an hour, try to touch the vessel sink and see if it’s attached properly and it’s stable enough.
However, if you have an old dresser, the built type of your dresser might not work well with silicone.
So before you apply the silicone to your dresser make sure it’s not forbidden by the dresser manufacturer. Silicone is an easy and cheap option to secure your vessel to a countertop.
Does a Vessel Sink Require a Special Drain?
No, almost every vessel sink uses the same typical type of drain. However, there is a difference in size and width of the drain but it doesn’t mean that there is any special drain. You just need to measure the sink drain and buy the drain according to it.
It’s always good to buy the drain along with the vessel because both will complement each other. The built type of drain is also your choice, you can use both plastic and steel both type of drains for your vessel sink. So there is no special drain to buy to turn your dresser into a vanity.
Wrap Up
No doubt, this guide will make your installation of a vessel sink on a dresser easy, if followed correctly. If you have an old-designed or stylish bathroom you can always renew or style it by installing a vessel sink on the dresser.
It doesn’t matter if you are trying to install a bathroom vanity from an old dresser, this guide will work for both old and new dressers. This will also be very helpful if you want your antique dresser turned into a bathroom vanity.
Study the guide and once you have acknowledged everything about it, only then proceed to install it.