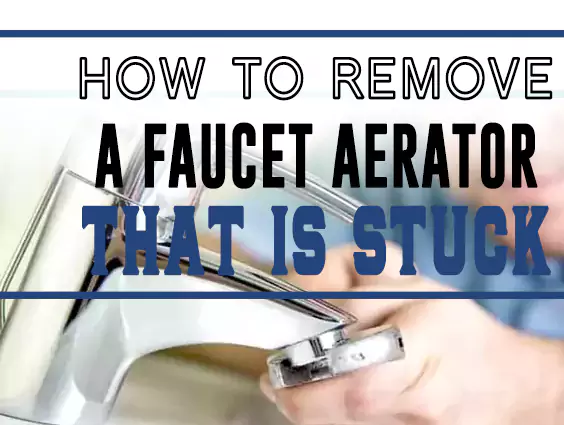
It is not uncommon for a faucet aerator to become stuck. But how to remove a faucet aerator that is stuck is a regular question we get asked.
This can happen if you have stopped using the faucet so that food particles have begun to build up around the edges of the aerator.
It may also occur if you are using a water softener system with hard water, which tends to cause mineral buildup on the edges of an aerator and make it more likely to become unstuck.
How do you do it? Worry no more as I have discussed how to get a stuck aerator off a faucet.

What Causes A Kitchen Faucet Aerator to Become Stuck
A Faucet Aerator may become stuck due to many reasons, including:
1. Debris
Faucet aerators filter water coming to your sink. Due to this, silt and minerals get trapped and start building up over time, leading to clogged faucets and low water pressure as a result.
2. Food particles
Food particles are another common cause of blockage in the faucet aerator. Fatty foods, in particular, tend to stick and accumulate over time.
3. Hard water
Suppose your home has hard water, then the minerals that are dissolved in it can build up on the edges of the faucet aerator. This will make the aerator lose over time and eventually cause it to become stuck.
4. Loose-fitting
If the aerator was not adequately fitted when installing, this could cause issues with it becoming loose over time and eventually being blocked.
5. Clogged Filter
Low water pressure due to a clogged filter or sediment buildup in your pipes will reduce water flow from an aerated faucet head.
This means that cleaning out the pipe is necessary before trying to remove any blockages from your sink.
6. Old Aerator
Old age can also contribute to why an aerator gets stuck. As the product ages and wears out, it will eventually become loose inside of its fitting, which causes water flow issues or even gets clogged entirely due to sediment buildup over time.
How to Remove a Faucet Aerator by Hand
Tools you’ll need
- Faucet aerator wrench
- Flathead screwdriver
- Phillips head screwdriver
Did you know that you can remove the aerator without any tool? Yes, you can when you follow the below steps.
Step 1: Turn off the water supply valve
This is a crucial step as you do not want water spraying all over while trying to remove the sink faucet head. It’s also best to have a bucket or container ready to catch any drips that may spill while removing the aerator from the faucet.
Step 2: Loosen the aerator
If you cannot remove the aerator from the faucet when it’s too tight, you can use a flathead screwdriver to help pry it off. Be very careful not to damage the threads on the faucet when doing so.
Step 3: Remove the aerator screws
If the faucet aerator won’t come off, you can use pliers or an adjustable wrench to loosen the nut that holds it together. This will release any pressure and allow you to pull off both parts easily.
How to Remove a Stuck Faucet Aerator Using Vinegar
Tools you’ll need
- A jar of white vinegar
- Aluminum foil
- Paper towels
- Household scissors
Step 1: Fill a jar with vinegar
Make sure the jar is filled with enough vinegar to submerge your aerator completely. This will help loosen any debris stuck inside the faucet, making it easier for you when you remove it later on.
Step 2: Place aluminum foil over the jar
Make sure that all sides are covered by at least two layers so there won’t be any leaks when you put them in your dishwasher later on.
Step 3: Place an aerator into the vinegar solution
Make sure to place it so that it’s completely submerged and not touching any other part of the jar; otherwise, you may damage or break your faucet aerators. It also helps if there is enough vinegar to cover the aerator altogether.
Step 4: Wait 12 Hours
Let it sit for at least 12 hours. The longer you let it soak, the easier it will be to remove when you’re ready.
Step 6: Remove The Aerator
Use paper towels to wipe off any remaining residue or debris that may have been left behind on the aerator itself.
If you see any rust spots, repeat steps one through four until they disappear entirely – this will ensure there isn’t anything else lurking inside your faucet before putting it back on.
Gently grab hold of it and twist it in a counterclockwise motion until it comes loose. Simply remove it.
How to Remove a Delta Faucet Aerator with Pliers
Tools you’ll need
- Pliers
- Channel locks
- Wrench
- Socket wrench
Step 1:
You need to firmly grasp the faucet aerator using your pair of pliers to prevent it from slipping. You can then twist it anticlockwise and remove it.
Step 2:
If the aerator is very tight, you may need a pair of channel locks or even a wrench and socket wrench to loosen it up.
Step 3:
You can use your hands, but only if they are strong enough to do so. However, using pliers will allow for better control when removing an aerator that has become stuck in place.
Try using a wrench or socket wrench if you have trouble removing the Delta faucet aerator with pliers.
Be very careful when doing so, as these tools can be dangerous if not used properly. Remember to twist it anticlockwise to remove it.
How to Remove a Stuck Faucet Aerator with a Rubber Wrench
Tools you’ll need
- rubber wrench
- adjustable pliers
- bucket or bowl to catch water
Step 1:
Turn off the water to the faucet at the source. This is typically done by turning a valve located close to the faucet.
If you are not sure where this is, check the owner’s manual for your dishwasher or ask a friend or family member for help.
Step 2:
Place a bucket or bowl under the aerator to catch any water that may spill out once it is removed.
Step 3:
Use adjustable pliers to loosen the aerator from the faucet head. If the aerator is stuck, try wiggling it back and forth gently before using the pliers.
Step 4:
Once the aerator is loose, use a rubber wrench to remove it from the faucet head.
How to Remove a Stuck Faucet Aerator with Heat
Tools you’ll need
- Hairdryer
- Hot water (preferably boiling)
- Pliers
The hot air will help loosen the adhesive that holds the aerator in place. Be careful not to get too close to the faucet as you don’t want to burn yourself.
If possible, try to pour boiling water onto the aerator as well. The heat and steam should be enough to dislodge the aerator from its position.
Note: If the faucet is hot enough, you can use your fingers to unscrew it. However, this method will only work for some types of aerators and may not be safe if yours does not have a heat-resistant coating on it. Still replacing a faucet aerator that is out of service can be a good idea.
How to Remove a Stuck Faucet Aerator with WD-40
Tools you’ll need
- Mark the spot on the faucet aerator where the set screw is located.
- Spray WD-40 lubricant onto the threads of the Aerator and allow it to sit for a few minutes.
- Using an adjustable wrench or pliers, turn the Aerator counterclockwise until it comes loose.
- If necessary, use a screwdriver to remove the set screw from the Aerator.
- Wipe up any excess lubricant with a rag or paper towel and rinse it off in hot water before replacing your faucet aerator.
- As always, be careful not to cut yourself during this process.
Why Does a Faucet Need an Aerator
1. Saves water use and reduces power bills
The faucet aerator is known for reducing water flow. This is helpful as it reduces the amount of water one uses. It also cuts the cost of power usage, especially when using hot water in your sink.
2. Beautiful water shapes during flow
A common trend with a faucet aerator is producing a nice stream of water as it comes out of your sink. The water is less wasted as one can direct it to where they need it most.
3. “Increased” water pressure
A water faucet can work really well where water pressure is low. It increases the pressure by mixing air with the water that comes from the tap. There is no need to purchase other devices to increase water pressure as this little gadget does its job perfectly without costing a penny.
4. Prevents clogging of valves
One primary purpose of a faucet aerator is to help in preventing the clogging of valves. It does this by breaking the water stream into many tiny droplets. Good kitchen faucet stuck aerator tip removing ideas can reduce the costs of hiring a plumber.
This helps to avoid any chances of dirt and other materials getting caught up in the valve, eventually leading to it getting clogged.
5. Sink disposal prevention
Sink disposal is a device used to grind food waste so it can be easily flushed down the drain. With this in mind and knowing how a faucet aerator works, it is logical why having one on your sink prevents clogging of valves or even getting food waste stuck in there like some people do when they don’t have an aerator installed.
Summing Up
A faucet aerator is vital as it helps in reducing water waste and keeps your sink clean. As seen from the article, faucet aerators can be a bit problematic. This can be worse when you do not know how to fix it yourself.
However, if you follow our provided guides you will easily figure out how to remove the stuck faucet aerator.