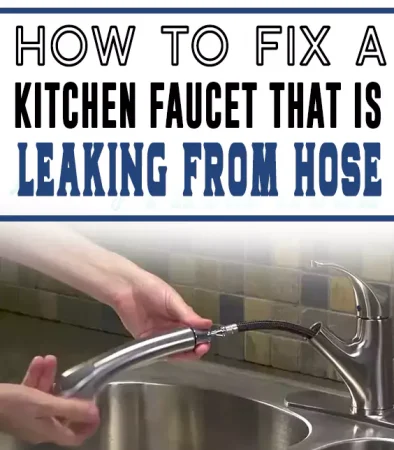
If you suddenly detect a faulty faucet, you will need to know how to fix a kitchen faucet that is leaking from the hose.
You may need to consider buying a new kitchen faucet. But you can go DIY and fix the leak with a few simple steps.
You can use plumbers’ tape to stop minor leakage. But if there are multiple leakages, you need to replace the sprayer hose. Especially, if your kitchen setup has a pull-out faucet, you must replace it with a new hose.
You may want to hire a professional but it’s doable yourself. Just owning an adjustable wrench can help you complete most of the parts.

Why Is Kitchen Faucet Leaking from Hose
Kitchen faucet sprayer hose leaking is not an uncommon problem. It’s an annoying problem for any kitchen environment. Yes, it can disrupt the water supply and create many messes.
Well, it’s a common problem for single-handle faucets with a pull-down sprayer. It’s obvious we don’t use the spray hose that often and forget it until we need it again.
That’s why most people can’t understand why there’s a leaky faucet. There are some common reasons for leaking between the spray head and the hose.
Here we are highlighting the most common reasons for faucet water leaks.
A Poor Hose Connection
It is the primary reason for leakage on your faucet body. Most of the time, there are loose ends on the hose connection. As a result, there’s water leaking seamlessly. The best solution for this problem is to reinstall a new sink sprayer.
Blockage on the Sprayer Head
Day by day, minerals or other gunks are sure to pile up in the spray hose or faucet body. This can also affect the water flow, and you get low water pressure.
The main reason for this is a clogged & stuck aerator. If you clean the aerator, you can avoid a dripping faucet.
Sprayer Head and Hose Connection Leakage
You can record a leak between the single-handle kitchen faucet head and the hose connection if not connected properly.
These are the main reasons common for a dripping faucet body. And it can be fixed pretty easily. In the next section, we will discuss troubleshooting the faucet hose leaking.
How to Stop a Kitchen Faucet Hose Leaking
Fixing a leaky kitchen faucet is not a difficult task. Any professional can fix a faucet leak with the help of professional tools like an adjustable wrench.
In most cases, you just want to replace a leaking faucet hose as you are hiring a plumber in the first place. Even though it is annoying, you can fix the leakage problem yourself.
Just like we said, this is a common problem for most flexible hoses on the market. And if you own a pull-out or pull-down faucet, this problem occurs frequently.
So, how to properly repair the faucet hose leaking? Before jumping to troubleshooting, let’s give you an overview of the task at hand.
The Difficulty Level: Around 1/5
DIY Troubleshooting Duration: Around 20 minutes
Things You Need Are: Basin Wrench, New Hose
So, these are the basics. Now let’s deep dive into the procedure for repairing a flexible sink hose.
Step 1: Diagnosing Your Kitchen Sink Sprayer
First, you have to diagnose the sink sprayer for recording the leakage. Turn the sprayer on and carefully check the sprayer head, hose, and connection.
This is an integral part of the process because you can assess whether you need a new hose or not. Use a plumbers tape and check if it works. If not, you need to buy a new hose for the spray head.
There are times when you can locate multiple leaks. So, identify them and move on to the following procedure.
Step 2: Turn off Your Water Supply Connection
After marking the leaking flexible faucet hose area, you have to turn off the water supply line. There’s a shutoff valve underneath your kitchen sink.
Use it to stop the complex water flow when removing the faucet hose. It’s better to use a hose bib to stop the water flow.
Step 3: Disconnect the Lock Nut
In order to install the new hosepipe, you need to remove the older one. You need to reach underneath your kitchen sink and locate the fitting sleeve nut for your hosepipe to do that.
Use a basin wrench to disconnect the nut. This is tricky as there’s little space to move your hands around.
Take it slow and loosen the lock nut. Once you loosen the nut, the hosepipe unscrews easily. This is how most faucet connection works.
Some modern models like the Delta faucet or Moen faucet come with a threaded piece called quick-connect. If you own one of these, unscrewing the hosepipe won’t be much of a task.
Step 4: Install the New Hose
Installing the new hosepipe is just as easy if you don’t own an older model. There are a few older faucet models that require you to remove the faucet. Yes, they demand a little bit of fight from you.
Now, we need to get the new piece out from beneath the kitchen basin. You need to insert the new hose through the faucet shroud. And to make things easier, rest the hose in the shroud.
Step 5: Connect the Diverter Connection
Now, you need to re-connect the diverter connection with the new hosepipe. Once you are complete, turn on the water connection again.
Make sure to check if the connection is proper or not. Be picky and try to find any leakage or problems with the connection.
If you are satisfied with the results, start doing your daily chores again.
Why Does Moen Kitchen Faucet Sprayer Hose Leaking
There’s no arguing; Moen is one of the top faucet manufacturers in the world. Their products last long and you get better value for money. Not to mention, they add a bit of personality to your kitchen setup.
Furthermore, the Moen faucet comes with a lifetime warranty. However, it doesn’t indicate there won’t be any leaks.
Yes, if the faucet cartridge or O-rings wear out, there will be leaks on the Moen kitchen faucet. When that happens, there will be sudden leaks in your kitchen sink water supply.
Also, if the faucet setup is not installed properly, there’s a continuous flow of water while working.
That’s not a problem at all. You just need to call them and ask for replacement parts. You are backed by their lifetime warranty program.
Moen will deliver the replacement parts free of charge. This is a sweet deal for sure. Primarily, there are four types of faucets available from Moen. Only pullout faucets require you to change the hose once there’s a leak.
Aside from the pullout faucet, it would be best if you changed the cartridge or the O-ring. But to fix pullout sprayer faucet, you need to replace the hosepipe.
How to Prevent Leaks Under the Sink
Drip drip drip! There’s a leak underneath the kitchen sink. You need to place your attention on that point in order to prevent any damage later on. Once you notice such a problem, get right on with the fix.
Yes, there are certain situations where you need to hire professionals. And in some cases, you can do it yourself. You can start by identifying the reason for the leakage.
So what about preventing the leaks? We can guide you with some simple steps.
Now, if you want to prevent a leaky sink, you should follow these steps accordingly.
1. Always Check the Plumber’s Setup
Yes, if you invest a bit of your time every month checking the water supply line, you can record any problem.
Most of the time, faulty plumbers setup is the main culprit behind a leaky sink. And anyone can identify such problems.
We should also tell you, that sometimes it’s the simple things that cause leaks. So, when you are checking the plumbers’ setup, try to look for parts that aren’t installed properly. Tighten some parts if you need.
Consult a professional plumber if you locate unwanted water leakage. Also, you better learn how to DIY some leakage problems. Here are the common leaks under the sink you can fix yourself:
- A pressurized water hose leak
- Drain line leaks
- Faulty seal or drain gasket
Note: If you can’t identify the leakage area or problem, you better hire a professional.
2. Try to Keep Your Storage Space Tidy
A messy kitchen setup poses a high damage risk. When there’s plenty of stuff around, you can’t find any noticeable problem at all. So, keep your kitchen setup clean.
Here we are discussing the 3 DIY fixing methods to prevent water flow under your sink:
How to Fix Drain Seal Leaks
If the drain seals leaking water, here’s how to fix it:
Step 1: Use a pair of pliers and gently remove the old drain seal.
Step 2: Take the new adhesive and apply it over the bare drain. Careful! You don’t want to put a lot of them.
Step 3: Replace the seal so that it stays centered around the drain.
How to Fix Drain Leaks
To fix drain leaks, just follow these simple steps:
Step 1: First analyze the drain outlet flange and determine the plumbers’ putty and remove the old layer.
Step 2: Now, check whether the gasket is flat or not. If not, you need to place it flat.
Step 3: Inspect any cracks or damage. If so, seal them using a fresh layer of plumbers’ putty.
Step 4: Replace any damaged parts.
Step 5: Screw the drain back together again.
How to Remove Sprayer Hose from Kitchen Faucet
The best remedy for a leaking flexible faucet hose is replacing it. And removing the hosepipe is not a big deal. Here’s how you remove the old sprayer hose to replace it with a new one.
Things We Need to Start
Before starting the procedure, you need to gather a basin wrench.
Step 1: Turn off the Water Supply
First, clear the cabinet beneath your sink. Then, you need to turn off the water supply. You need to shut down the hose bib to stop the water supply. Test the faucet to make sure the water supply is entirely off.
Step 2: Locate the Sprayer Hose
It’s a little hard to work in that cramped space. But you need to deal with it. When you locate the sprayer hose, trace the hose assembly. Then, you need to find the mounting nut.
Step 3: Loosen the Mounting Nut Using Basin Wrench
Use the basin wrench and try to loosen the nut; and, no need to rush. Take your time and make sure the mounting nut is loose.
Step 4: Unscrew the Hose
After you loosen the nut, the hose will unscrew easily without any problem. Now, if it’s still not coming out, use the basin wrench to loosen the nut again.
Reminder: Some modern faucet model features a snap-on connection. You can just unhook the clip from the outlet tube and replace it with a new one.
Wrapping Up
As you can see, you can fix most of the visible leakage problems yourself. When to hire a plumber? That’s easy, if you are not comfortable with the inner workings of the faucet, you can hire a plumber. You don’t necessarily need a plumber to replace the hosepipe.
However, if there’s any uncommon or unnoticeable leakage other than the hose you can’t detect, you better ask a professional for help.
Also, you need to hire a professional for older faucets as most of the time you need to remove the whole setup to replace the hose.

