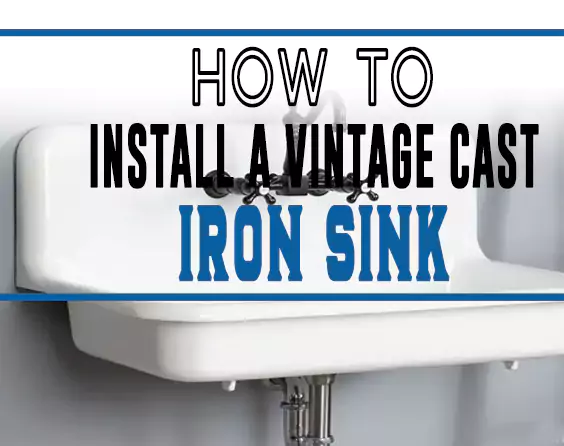
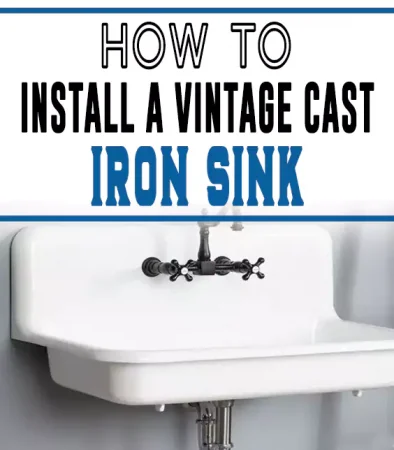
You can install a vintage cast iron sink in your kitchen regardless of your DIY experience. We’ve got a complete guide to the installation.
Cast iron sinks are usually made with iron alloy, then covered with porcelain enamel coating. The cast iron farmhouse sinks also come in various types and sizes to improve the appearance of your kitchen.
The sinks also come with a pre-drilled mounting hole, so all you have to do is snap the sink into place. If not, you can make a new hole in the cast iron sink.
In order to install the vintage cast iron sink, you need extra hands to help in placing the heavy sink. For the sink to sit securely in its place, it’s essential to reinforce it with a support frame.
5 Steps to Install a Vintage Cast Iron Sink:
1. Accumulate All the Required Items
The first thing you need to do is to search for everything you require to install the sink. Otherwise, the process may flop. The following are materials needed for the procedure;
- Vintage cast iron sink
- A tape measure or the sink’s template
- Clean damp cloth
- Putty
- Screwdriver
- Metal nut
- Rag
- Silicone sealant
- Pipe cutter
2. Measure the Sink
Some cast iron sinks do not come with a template to guide you about the space measurements required.
In such a case, you need to take a tape measure and measure the sink. Then measure the area you want to install the sink.
If the two measurements do not fit, you need to adjust the installation space to accommodate the sink.
The template that comes with the sink would produce a better cutout.
3. Fix the Basket Strainer and Faucet
You cannot install the sink without fixing the basket strainer and faucet first.
Head over to the drain hole and clean it using a damp piece of clean cloth. Ensure all debris, dirt, and dust are gone. As a result, the drain hole will seal effortlessly and firmly.
Then take the basket strainer and put much putty under it. Next, push it carefully into the drain hole. When through, you will have to connect the basket strainer to the sink’s underside.
Start by putting a large washer. Then follow it with another thin washer. When the two washers sit correctly beneath the sink, place a metal nut. Then screw them tightly using a screwdriver.
While tightening the nut to connect the basket and the sink, some putty may flow out because of the pressure created. Use a rag to clean it off.
After installing the basket filter, you need to fix the faucet. Each cast iron sink comes with a faucet installation manual, and the instructions differ due to their brands and designs.
4. Fix the Vintage Cast Iron Sink
With the faucet and basket filter in place, it’s time to install the vintage sink. Also, remember to look for someone to help you handle the cast iron sink because it is heavy.
When removing the sink from its packaging, keep the top surface facing down to protect the sink from any damage or scratch. While in that position, take silicone sealant and apply it around the sink’s edge.
Ensure all edge parts has enough silicone sealant to help secure the heavy sink. Then place it inside the cutout area. Adjust it to sit correctly on the counter.
The excess sealant will pop up around the edges after fixing the sink. Please do not allow it to dry in those areas, as it will make the sink look untidy.
Pick a clean, dry rag and wipe out the excess sealant until the area looks neat. Then leave it to dry for approximately 24 hours.
5. Attach the Sink to the Plumbing System
Connect the sink to the plumbing system after settling properly in its required place, and the sealant is entirely dry. Start by attaching the basket strainer with the drain.
Use a pipe cutter to trim off the pipe’s edges. Then connect the attached basket strainer and drain to the faucet. You will need to follow the manufacturer’s instructions to do so.
As illustrated above, installing a vintage cast iron sink is straightforward. It may take much of your time, and you need to be cautious not to damage the sink, but you can do it even without experience.
Read More: How to Install a drop-in Cast Iron Kitchen Sink.
Do Cast Iron Sinks Need Extra Support?
Because the sinks are heavy, you may need to create a frame to support them. It’s another easy DIY home project you can do without any assistance.
How to Build a Support Frame for Vintage Cast Iron Sink
Step 1: Collect the Necessary Materials
Like any other project, the first thing to do is look for all items needed to make the support frame. You will need;
- 2 x 4 lumber
- Tape measure
- Jigsaw
- Screw gun
- Pen and paper
Step 2: Measure Underneath All the Sides of the Countertop’s Upper Part
The support frame will have to reinforce the entire sink space. You will therefore start by measuring the upper four sides of the sink cabinet or countertop.
The reinforcement boards will have to sit under the top sides of the countertop. It means that you will have to measure the sink’s cabinet or countertop top upper part from below it.
Use a tape measure and write down the measurements.
Do not assume that the length and width of the upper side of the countertop will be similar to the other sides.
The cabinet or countertop may come in different designs, meaning each four sides may contain a different size.
Step 3: Cut the 2 x 4 Lumber into the Sizes Gotten
After knowing what each side measures, cut the 2 x 4 wooden board into four boards representing every side.
Step 4: Fix the 2 x 4 Wooden Supports Under the Countertop’s Upper Side
When the boards are cut correctly to the exact sizes, pick each and place it where it fits under the countertop’s upper part.
Then take a screw gun and attach it to the countertop. You will barely see the support boards because they sit under the countertop.
Step 5: Measure the Countertop’s Height
You will need to offer the wooden supports more reinforcement after reinforcing the upper side of the sink’s countertop.
Take measurements from the board at each corner to the bottom.
Then record the measurements gotten.
Step 6: Cut out the 2 x 4 Lumber According to the Recorded Measurement
Like reinforcing the upper part of the sink’s countertop, you will need to cut out the reinforcing boards based on the acquired measurements.
Fix each wooden support to run down from every corner of the countertop, starting from where it meets the upper wooden support to the floor.
Step 7: Secure the 2 x 4 Boards
The back part of the countertop may be near or far from the wall. If near to the wall, you can secure the wooden supports on it using screws.
Start by placing the first board against the wall running down to the floor. Then use a screw gun from the board to the wall at various intervals to screw it firm.
Don’t forget to screw the joint joining the board under the upper part of the countertop or cabinet and the board running downwards to the floor.
Do the same with the other wooden support on the other corner adjacent to or near the wall.
The other two boards will be on the front side of the cabinet or countertop, where there is no wall to secure them. You will need to join them with the board underlying the countertop’s upper part, using a screw gun at the corners.
When through, you will have a frame that will help support the heavy cast iron sink. You can now go ahead and place your sink.
If you want to fix your cast iron sink, you should choose a day when you have a lot of time on your hands.
Installing a Vintage Drainboard Sink
Vintage drainboard installation may be challenging, especially when you have a heavy one. For example, some drainboard sinks could weigh more than 200 pounds.
You’ll need additional hands to help out with the lifting in cases like that. Other materials you’ll require are mentioned in the guidelines below.
Materials Required:
- Safety glasses
- Gloves
- Measuring tape
- Wrenches
- Pliers
- Jigsaw
- Screwdriver
- Plumbing marker
- 2×4 inch supports
- Plumber’s putty or caulk
- Undermount sink brackets (optional)
- Drill (optional)
Step 1: Protect yourself
Protection from flying debris and other injuries is essential. Put on safety glasses and gloves before starting.
Step 2: Examine the sink and installation space
The first step you want to take is to examine your dashboard sink to ensure it’s the right fit. Also, check for missing parts and get replacements from antique stores.
Next, measure the sink from all sides and do the same for the intended space. You also want to check the existing plumbing setup and how it may affect your work.
Step 3: Mark points and cut appropriately
If the sizes aren’t compatible with extra space on all sides, don’t worry. Instead, using a plumbing marker, mark the points on the cabinet and cut them out with a jigsaw.
Step 4: Install additional support
Install adjustable undermount sink brackets into the cabinetry if the sink is heavy.
Adjustable supports are better because they give you the freedom to work with any height and weight. It’s also a good idea to buy options that do not require drilling into the wall.
Step 5: Install 2×4-inch supports
Depending on the sink design, measure 2×4-inch supports or plywood and cut as needed. Install where needed using screws, but ensure they get extra support from the existing structure.
Step 6: Place the sink
With the support from extra hands, gently place the drainboard sink in the space. Set correctly and check other areas like plumbing to be sure.
Fasten all the parts together and ensure everything remains tightened. Connect the water lines and confirm there are no leaks or water damage.
Step 7: Seal the drainboard sink with caulk or putty
Apply plumber’s putty or caulk around the sink edges to seal it to the counter surface. Clean excess putty and wait for it to dry.
Step 8: Finish off with extras
Your dashboard sink should be ready for use, but you can add antique hardware. You can also polish the sink using high-grade polishes.
Closing Thoughts
Most homeowners prefer to install vintage cast iron sinks in their homes because of their durability, aesthetic appeal, and ability to resist stains and rust. Moreover, cast iron sinks are easy to clean and maintain.
Another advantage of the sinks is that you can save money by installing them yourself. Though you may need extra hands to help you handle the sink because of its heavy weight, it’s something you can do effortlessly.
Mostly, when installing the vintage sink, it’s advisable to build a support frame. The structure will help support the sink’s heavyweight.
If it’s your first time installing, don’t fret. Just follow the above guide to install a vintage cast iron sink perfectly.